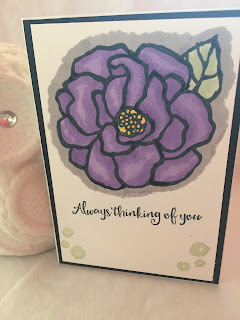
Tuesday, 31 July 2018

Christmas in July

Christmas in July


 My card project for Crafter's Castle is photographed below:


This is one of my favourite techniques when it comes to cards and especially Christmas Cards.  I first cut a square Vanilla card base.  I trimmed a Vanilla card layer the same size as the card base front panel and then two smaller Vanilla squares.  Also I  cut a Vanilla rectangle for the sentiment.  

Next I cut the Musical score DSP (I don't know where the patterned paper is from) into three pieces; each piece a 1/4" smaller than the Vanilla card stock. All the pieces of DSP and card stock were sponged on the edges with a light brown ink.  

So the next step is to get the three pieces of DSP and put them one on top of each other (centring them as accurately as possible).  I had some low tack tape which made this easier to do.  Now with green and red water colour pens I coloured over the holly leaves and berries whilst this was on the acetate block.  Then I turned this over, huffed (a technical term - breathe onto the ink to moisten it! - LOL) and stamped the image.  I continued this all over the three pieces of Vanilla card stock.  Whilst all the inks etc. are out I stamped the sentiment in green ink "Season's Greetings" onto the Vanilla rectangle.   On the envelope I stamped the sentiment "Happy Mail" and the image of the duckling delivering the letter; this enables the recipient of the card not to think they are getting a bill!

The next stage is to  adhere the pieces together. I generally adhere the DSP to the corresponding piece of card stock first with double sided tape.  This then helps me to remember to tie the ribbon around the smallest piece and tie a bow a little off-centre.  The sentiment is adhered just underneath the bow on the smallest piece of DSP.  (NB: Always adhere each of the DSP pieces the same way round.  So I would draw a tiny pencil dot at the top of each piece before I start stamping.)
9ing the pieces together starting with the largest down to the smallest.  Still remembering to have the DSP the same way around so that the pattern stamped although no actually touching they are continued around the DSP and onto the smallest pieces as well.  The final thing to do is to adhere the whole thing to the  Vanilla card base for strength.

I hope you enjoyed finding out how I made this "Christmas in July" project.  If you did, please leave me some feedback/comments.  Until next time, keep crafting!


Lorraine
:O)

Monday, 30 July 2018

MFT Characters

MFT Characters

The MFT sketch challenge (#MFTWSC395) looks like this:


I don't know about you but I love the MFT characters, whether they are critters or otherwise.  MFT have just done something right with them all, they just appeal to me.  So when I saw the sketch challenge for this week I decided to try and put as many of the characters as I could onto it.  

This is my card project using the sketch above.  


So in order to create this card I looked for the MFT characters I had in my craft stash and I chose:

A Bear from "Beary Special Birthday"
An Elephant from "Adorable Elephants"
A Hippo from "Happy Hippos"
A Dragon from "Magical Dragons"
An Astronaut from "Space Explorer"
and a Chef from "Recipe for Happiness".

I trimmed a card base (8 1/4 x 5 7/8" scored at 4 1/8") from Stampin' Up "Lovely Lipstick" card stock.  I cut a white layer (5 5/8 x 3 7/8") for the inside and using another piece of white card stock I die cut a stitched circle (3 1/2").  I then trimmed a strip of Stampin' Up "Call Me Clover" card stock (1" x 5") and very lightly with a pencil drew where this was going to lay across the circle die cut.

Then masked when necessary when I was stamping the MFT characters.  I did use my stamping positioning tool because I could darken the Black Memento ink if necessary.  I also stamped directly onto the card front with some butterflies and presents.  These images I carried on inside the card and also on the envelope.  Before I put the inks away, I stamped the sentiment "Happy Mail" and the image of the duckling delivering the letter onto the envelope so that the recipient of this card would know that they were not receiving a bill!

Next I coloured my MFT characters with my Prismocolor Pencils and used my Prismo-blend pen to smooth out the pencil lines.  I added some white highlights with my white gel pen and I darkened their eyes using my black gel pen.

Now I was onto the sentiment, I used my embossing buddy first on the card stock strip and then stamped 'Happy Birthday' with Versamark, added Gold embossing powder and heat set.  I also heat set the images whilst I was doing this too in order that the gel pens were fixed and would not smudge when I was putting the card together.

Not much to put on this card base, the inside layer adhered using double sided tape and the circle was adhered using dimensionals to give some depth.  Then the strip was adhered using double sided tape as well.  This completed my project.

I love it!  If you love my MFT character card as much as me, then leave me some feedback/comments below thank you.  Until next time, keep crafting!

Lorraine
:O)


Daffodil Yellow

Daffodil Yellow

This project is going to be used for two different card challenges, one a sketch challenge and the other a Tic Tac Toe challenge.

Hannah from Hancrafted Creations is celebrating her first year Anniversary as a Stampin' Up Demonstrator so she is doing some Give-aways.  This particular Give-away is to win 2 stamp sets by creating our own project from the card sketch she used on her video tutorial.  The card sketch is this:


The card project followed the bottom line (Yellow, Stitching, Rectangle).  My project that I have been able to use for both these challenges is photographed below:


So I started off with a white card stock card base (8 1/4 x 5 7/8" scored at 4 1/8") and a yellow layer of card stock (5 5/8 x 3 7/8").  Then with a light piece of yellow card stock I cut out (x2) stitched squares (3"), one of the pieces I ran through the Big Shot in Stampin' Up 'Climbing Vines' embossing folder; the other I stamped one of the flowers from Stampin' Up 'Perennial Flower'.  On the yellow layer card stock I stamped with Delightful Daffodil ink using another flower stamp from the 'Perennial Flower' stamp set but a smaller one this time; I continued stamping this flower image inside the card and on the bottom of the envelope as well.  On one of the rectangles I stamped the dots and on the other the sentiment "Happy Birthday".    I stamped (x2) of the Daisy flower stamp before punching this out with the Daisy Punch and I stamped the middle too, this I punched out with the 1/2" circle punch.  All in all I was stamped and punched out!  LOL  

I did one more bit of stamping, I stamped the sentiment 'Happy Mail' on the front of the envelope along with the image of the duckling delivering a letter so that the recipient of this card would know that they were not getting a bill.  

It is fairly obvious I feel how this card went together, it does not have very much depth due to the amount of layers it has.  The only part on a dimension is the Daisy; the rest has all been adhered using double sided tape flat (oh no - sorry there is a thin dimension under the 'day' part of the sentiment because it is raised with the layers and the right-hand side needed raising slightly as well.)

I do like this card it made me smile all the while I was making it, perhaps it is the colour, perhaps the layout or it could be that I love both the stamps sets I used "Perennial Birthday" and "Daisy Delight".  Anyhow it does not matter, I hope you like it and if you do  please leave me some feedback/comments.

Till next time, keep crafting!

Lorraine
:O)


Sunday, 29 July 2018

Magical Mermaid

Magical Mermaid

Kelly Acheson (A Stamp Above), a Stampin' Up Demonstrator made a YouTube video tutorial on July 20th 2018 called 'Sea of Textures'.  On this video tutorial she set a challenge to use the same card sketch that she had just used to create her project and create one of our own and to send it to her via email.

This is my project photographed below:


Initially I started off with a white card stock card base (8 1/4 x 5 7/8" scored at 4 1/8") and I cut a Night of Navy layer (5 5/8 x 3 7/8").  Next I found a piece of patterned paper in my craft stash that was in a water colour pack; this particular piece looked liked under the sea.  I cut this into (x3) (5 x 1") and put them into my stamp positioning tool butt up together.  I stamped in black Memento ink the sea bed, the seaweed and the bubbles whilst the pieces were all together.  Then I took them out of the stamp positioning tool and adhered them to the layer of Night of Navy card stock with a (1/4") gap between each of them.  

I then stamped another set of seaweed on some scrap white card stock as well as the mermaid.  These I then coloured with my inks and an Aqua pen and left to dry.  I then cut another piece of Night of Navy card stock (2 1/4 x 1") for the sentiment.  I punched a ribbon hole in each end with the new Stampin' Up Trio punch and then used my embossing buddy and stamped the sentiment "Have a Magical Birthday" in Versamark and covered this with copper embossing powder and heat set it.  

The mermaid was dry now so I covered her tail in Wink of Stella and added rhinestones to her hair.  The seaweed I adhered inside the card.  I then stamped the sentiment "Happy Mail" in black Versamark ink on the envelope along with the image of the duckling delivering the envelope so that the recipient of this card will know it is not a bill!  I also stamped a silhouette image of a mermaid in the bottom left-hand corner.  

After putting the card together, the final embellishment was to put a few rhinestones on the sandy bed and a blue rhinestone on the corner of the sentiment.  I was really pleased with how this project came out as it was the first time I had used the stamp set.    If you have any comments or feedback that you think is appropriate please feel free to place them below, thank you.

Till next time, keep crafting!

Lorraine
:O)


Thank You for Abstract Impressions

Thank You for Abstract Impressions

This project is going to cover two different card challenges as it meets the criteria for both.  Firstly, it is going to be part of the Global Design Project Challenge (#GPD148) which is 'CASE the designer Connie Collins.  


So my project for these two challenges is photographed below:


So to create my project I firstly trimmed a "Merry Merlot" card stock card base (8 1/4 x 5 7/8" scored at 4 1/8").  I then trimmed a "Mossy Meadow" card stock layer (5 5/8 x 3 7/8"), a further "Grey Granite" card stock layer (5 3/5 x 3 5/8") and a White card stock layer (5 5/8 x 3 7/8") for the inside of the card.  

Using the Stampin' Up stamp set "Abstract Impressions" I stamped my own DSP on the Grey Granite card stock layer using one of the flower stamps (which is a 2-step stamp) and one of leaf stamps (which is also a 2-step stamp).  I stamped off the ink of the first stamped image and used second generation ink for the image and then when stamping on the top with the second stamp I stamped at full strength of ink colour.  I used "Merry Merlot" for the flowers and "Mossy Meadow" for the leaves.  I also stamped an image of this flower inside the card and on the bottom of the envelope to extend the theme of the project.  I had already die cut a circular pattern for the front of the card in white card stock but I then used the Stampin' Up "Starburst" punch to punch out a circular shape for the sentiment.  I stamped the sentiment "Thank you" which is part of the "Abstract Impressions" set  into the centre of the "Starburst" white card stock in Black Versamark Ink.  Whilst the ink was out I stamped "Happy Mail" and the image of a duckling delivering the mail on the front of the envelope.  This helps the recipient of the card know it is not a bill!

The card just needed putting together now.  The (1") ribbon was put around the 1st and 2nd layer of card stock and secured behind before these layers were adhered to the card base.  The die cut was then adhered with wet glue over the top of the Starburst punched sentiment.  The final embellishment was to add a single pearl to the end of the word 'Thank' in the sentiment.  This completed my project.

I hope you enjoyed finding out about how my project came together and will leave me comments or feedback if you think it is appropriate.  Thank you for coming to my blog page and this post and until next time, keep crafting!

Lorraine
:O) 


Rainbows and Butterflies

Rainbows and Butterflies


I was really excited to see the Theme of this week's challenge because I love both these; especially butterflies.  So below is my project I created for the challenge:


 So to create my project I initially trimmed some Vanilla card stock (8 1/4 x 5 7/8" scored 4 1/8") to create a card base.  I trimmed a second and a third layer in Vanilla too (5 5/8 x 3 7/8").  On the second layer I coloured strips of colour in Rainbow order (Red, Orange, Yellow, Green, Blue, Indigo and Violet) using my Spectrum Noir Alcohol pens.  On the third Vanilla card stock layer I die cut (x4) different butterfly shapes on the Big Shot.  (The most difficult part of this project up to now was poking all the little pieces out of the butterflies' dies!)

I then immersed the die cut butterflies one by one into the Versamark and covered them in Copper embossing powder and heat set these.  If there was little bits of embossing missing I used my Versamark pen just to touch up these parts and repeated the embossing powder and heat setting again.  I love this copper embossing powder and the butterfly die cuts looked amazing in it.  I then found a sentiment "Just For You" in my Stampin' Up "Butterfly Blooms" stamp set and with Black Versamark ink I stamped this at the top of the third layer of Vanilla card stock.  

Whilst this ink was out I stamped the butterfly from 'Butterfly Blooms' inside the card base and on the bottom of the envelope to extend the theme of my project to these areas.  I also stamped the sentiment "Happy Mail" and the image of the duckling delivering the envelope so that the recipient knows that they are getting something nice to look at.  

The rainbow layered piece of card stock was adhered to the card front and the die cut layer was adhered using dimensionals.  The butterflies were adhered with wet glue just at their bodies so that their wings were free from the card stock.

This completed my project, thank you for coming to read this blog page of mine if you have comments or feedback I would appreciate it if you would leave these below.  Thank you again, till next time, keep crafting!

Lorraine
:O) 


My Favourite Things

My Favourite Things

SU! Only Challenges (SUOC204) this week is to create a card/3D object with your favourite Stampin' Up products.  So 'My Favourite Things' are incorporated in my project photographed below:


So my new favourite colour by Stampin' Up is 'Highland Heather' so I started by creating a card base using this card stock (8 1/4 x 5 7/8" scored at 4 1/8").  I then put a second piece of Highland Heather card stock (5 5/8 x 3 7/8") through the Big Shot in my favourite embossing folder presently which is "Basket Weave" (I was so pleased that this was carried over into the catalogue from the Sale-A-Bration.  I next used my favourite DSP (Wood Textures) cut at (4 x 2") and punched 4 holes at each corner and inserted a brad (So glad that Stampin' Up have brought back the brads!)  I stamped with my favourite stamp "Delightful Daisy" - stamping the daisy head (x3) in Highland Heather ink in my Stamparatus of course (another of my favourite pieces of crafting equipment from SU.  I punched these out using the Daisy Punch (love my punches!!!!) and also punched out Vellum leaves using the Leaf Punch (from the Painted with Harvest stamp set).  In the Delightful Daisy stamp set there is a very cute stamp with three little daisies on it, I stamped this inside the bottom of the white card stock to extent the theme of the front panel and also along the bottom of the envelope too.  On the envelope I also stamped the sentiment 'Happy Mail' and the duckling delivering the mail so that the recipient of this card knows it is not a bill!

Now to put the project pieces together.  The ribbon is tied in a decorative know around the Wood Texture DSP and the Basket weaved dry embossed card stock.  The daisy petals are joined with glue dots and a gem is added to the centre as well.  When all the components are in the correct places; the final embellishment I put on my project are some Nuvo drops matching my card stock of choice today.

Thank you for joining me in my blog post, I hope that you enjoyed reading what my favourite Stampin' Up products are at present.  I could have gone on and on because I love all the Stampin' Up products.  Please leave me comments or feedback if you feel them appropriate.  

Till next time, keep crafting!

Lorraine
:O)


Thursday, 26 July 2018

Nature Blooms

Nature Blooms

This project on this blog post will cover the criteria for two different card challenges; this was not purposefully done but it is useful because it means I have one less card to make.  (Especially since I have chemotherapy tomorrow morning.)  


So I hope you can easily see why these two challenges can be covered by one project.  My project is photographed below: 


I created this project on a white card base (8 1/4 x 5 7/8" scored at 4 1/8").  The layer was a piece of white card stock (5 5//8 x 3 7/8") which was put through the Big Shot in the Stampin' Up 'Petal Leaves' embossing folder; this was then adhered to the card base with double sided tape.

Next I cut some blue foam (5 x 3") and some blue vellum to the same size.  I rounded two opposite corners and drew white stitches on the vellum with a white gel pen.  I adhere the foam to the embossing layer with strong double side tape and the vellum was adhered to the foam with small glue dots one in each corner.  

I then cut some burlap (1 x 3 1/4") and put pennants at both ends creating a banner.  This was adhered using double side tape too.  The I adhered the sunburst circle with the floral image into the middle of the burlap.  

Now back to the Big Shot, I used a variety of small flower dies and leaves too, to cut out different shapes in pink, purple, green and some blue foam.  These were then arranged on the card front and adhered with wet glue.  I put a heavy acetate block on top whilst this was drying.  

On the envelope I stamped the sentiment "Happy Mail" and the image of the duckling delivering the mail; this ensures that the recipient of this card knows that it is something nice rather than a bill!

If you have enjoyed this blog post, please leave me some feedback or comments please.  I love the fact that other crafters and friends are coming to see what projects I am making.  If there is anything particular you would like to see; let me know.

Till next time, keep crafting!

Lorraine
:O)

Chick, Chick, Chicken ...

Chick, Chick, Chicken ...


I have had this Stampin' Up stamp set 'Hey Chick' for over a year it was  in last years SU catalogue 2017-2018 and it has been retired and is not in the new catalogue.  So I felt that these critters needed to be given another outing.  Below is my submission photographed: 


There is actually old and new on my project, the stamp set is old and the dynamic embossing folder is new.  I have just recently purchased the Stampin' Up 'Hexagon' Dynamics Embossing Folder and felt it was ideal for this design to look like chicken wire used to make chicken runs.  

I stamped all the critters in the stamp set using the masking technique for a couple of them.  I stamped the little egg inside the card with the sentiment "you're a good egg".  I also stamped eight of this egg image along the bottom of the envelope.  Also on the envelope I stamped the sentiment "Happy Mail" and the image of a duckling delivering an envelope.  (This helps the recipient recognise that they are not getting a bill.)  On a (1 1/4") circle I stamped the sentiment "Just For You"; this completed all the stamping necessary.   The critters were coloured in with my Prismocolor Pencils and so was the sentiment on the circle.  

I adhered the images onto a white card base (8 1/4 x 5 7/8" scored at 4 1/8") with strong double sided tape and the embossing folder I cut along the hexagon shapes to create a zig-zag edge top and bottom.  These two parts were adhered onto the card front with Scotch thick foam tape to give the card depth and dimension.  The circular sentiment was adhered to the bottom section of the embossing using foam pads.  

If you enjoyed this project as much as I did making it, please leave me some feedback/comments, thank you.

Until next time, keep crafting!

Lorraine
:O)


Wednesday, 25 July 2018

Memories & More

Memories & More


Initially I wasn't quite sure what to do for this sketch challenge, so I looked through my stamp file and then my dies.  It wasn't until I had started to look for the folder which holds my white card stock card bases that I found my new box of Stampin' Up Delightfully Detailed Memories & More Card Pack.  I flicked through these cards and found a couple that I liked a lot in Blackberry Bliss and Whisper White.  So I thought I would give it a go.


A white card stock card base (8 1/4 x 5 7/8" scored at 4 1/8").  The spotty layer (5 5/8 x 3 7/8"); I had to cut down the smaller card pieces to (2 1/4 x 1 1/2") so that I left a good margin around them.  I adhered these onto the layer using double sided tape.  I then looked in my ribbon stash and found one which was a very similar colour to that of Blackberry Bliss; I laid a strip across the middle of the patterned cards and this was secured at the back of the spotty layer.  Before the bow was made I adhered the spotty layer to the card base with strong double sided tape.  I tied a bow out of the remaining ribbon and adhered this to the strip of ribbon using the same strong double sided tape.  

Now for a sentiment and embellishment.  Inside the Memories & More Card Pack is a selection of sentiment stickers; this 'thanks' matched the colour scheme of my project.  I used two small flower punches to punch out flowers from the scraps of card that I had trimmed off.  I adhered these with a small glue dot underneath and then I put a small rhinestone in the centre of each flower.  

Inside the card, to extend the theme I adhered a tiny strip of the spotty layer (which had been trimmed off) to the inside fold and glued one each of the designs of the punched flowers into the top right-hand corner.  

On the envelope I glued one each of the punched flowers onto the bottom left-hand corner and then stamped the sentiment 'Happy Mail' and the duckling delivering the mail in the top left-hand corner.  This helps the recipient of this card know that they are getting something nice to look at rather than a bill!

Thank you for joining me in this blog post, if you have enjoyed reading about my project please leave me some feedback/comments.  Till next time, keep crafting!

Lorraine
:O)


Thank You Apple

Thank You Apple

Facebook group Stampin' For All Design Team Challenge was to come up with something which said 'Thank You' to our teachers who support our children throughout their educations.  

In my September 2018 25th Anniversary issue of "Crafts Beautiful" there was a pattern template for an Iris Paper Fold Apple.  I had never done an Iris Fold before, but had seen them and was keen to give them a go.  


So initially I started off just like a normal card creating a red card stock base of (8 1/4 x 5 7/8" scored at 4 1/8"); then a black card stock layer (5 5/8 x 3 7/8") and finally a white card stock mat (5 3/8 x 3 5/8").  

I then traced the outline of the apple from the template in the magazine, transferred the tracing to the white card stock and then with a craft knife cut away insides of the leaves, stalk and apple shapes on the white card stock.   Next I traced the Iris folds template, cut green and red paper (not card stock - this is too thick) into 2cm strips.  Then score and fold these in half.  With the pattern underneath the white card stock, starting with the number 1, place the score line up against the line and secure at the back with tape.  Continue following the numbers on the pattern until you get to the last one.  Then you put a small piece of white card over the final part.  

When putting the card together, the black card stock will adhered straight to the red card base and then there will be some bulk to the white card stock with the strips of paper underneath it creating the image.  I used some silver washi tape to secure this down after putting double sided tape on the under side of the white card stock.  Also I put a piece of ribbon around the lower half of the card stock and secured this behind the black card stock layer.  I tied a bow and adhered this separately onto the ribbon with glue dots.  I also added a rhinestone to the white square of card stock showing from behind the pattern.

I stamped the sentiment 'Thanks' on red card stock and punch this out with Stampin' Up Classic label punch and adhered this straight to the card front.

Finally the envelope was decorated with the sentiment "Happy Mail" and the image of the duckling delivering the mail so that the recipient of this card knows that it is not a bill!

Thank you for looking at my blog post and spending some time reading through it.  I would appreciate any feedback or comments that you might feel necessary.  Please feel free to come back again. 

Till next time, keep crafting!

Lorraine
:O)


Waterfront

Waterfront

Karen McClure sets Colour Challenges for those part of Stampin' For All Facebook Group, you can ask for as many different challenges as you want.  If you press on Karen's name it will take you to the album with all the entries in her challenge.  


So the colours Karen gave me were So Saffron, Granny Apple Green, Very Vanilla, and So Suede.  I decided to use the Stampin' Up "Waterfront" stamp set.  I was also able to use the same design in another Stampin' For All Card Challenge named 'Summer' as well.


I trimmed an A4 piece of Very Vanilla card stock to (8 1/4 x 5 7/8" scored at 4 1/8") for the card base.  I then cut a piece of So Saffron (5 5/8 x 3 7/8") for the layer and then a piece of Soft Suede (5 3/8 x 3 5/8") for the mat.  I finally cut a piece of watercolour paper 1/8th smaller to go on top.  

So I started with 'Pool Party' at full strength at the bottom for the sea and I sponged the same blue ink at the top for the sky but this was a lot lighter.  I sponged a So Saffron sun.  I then inked up Soft Suede and stamped a mountain image full strength and then second generation and repeated this.  I sponged the Soft Suede from the mountain area right up to the water edge.  I then inked up the palm tree trunks in Soft Suede too.  The beach huts and palms on the trees were stamped with Granny Apple Green ink.   

I put a small twine bow in the bottom left-hand corner.  Then I used Memento Black for the sentiment "Every Little Kindness Makes the World Brighter" and also for the flock of birds in the sky.  This ink was then used to stamp the sentiment "Happy Mail" on the front of the envelope and the image of the duckling delivering the mail which is to indicate to the recipient of this card that they are not receiving a bill.

If you have enjoyed visiting my blog post, please let me know by leaving some comments in the feedback thank you.  

Till next time, keep crafting!

Lorraine
:O)


Tuesday, 24 July 2018

Beautiful Day

Beautiful Day

Anna Pickering (Stampin' Up Demonstrator) put on a Blends Class on Saturday, 14th July 2018.  During this fabulous afternoon, we were able to stamp the images (the butterfly and the flower) from the 'Beautiful Day' stamp set and explore the use of Blends on these before creating small notelets with the images we liked the best.  

Blending is a great technique to use with the alcohol markers (Blends as Stampin' Up call them).  It is very therapeutic to colour and blend.  I did not complete all my cards so I finished these off at home.  Here is a gallery of my finished designs:


Blending at Anna's


Finished 'Beautiful Day' Flower in Highland Heather  


Finished 'Beautiful Day' Butterfly in Highland Heathers with flower stamped in Basic Grey. 


10 finished cards with either the flower or the butterfly from 'Beautiful Day' stamp set blended using alcohol markers (some Stampin' Up and some Spectrum Noir).


Stripes

Stripes

Stampin' For All FaceBook group were set a Sketch Challenge by Ian Potter on Wednesday 27th June 2018 the sketch we had to follow is below.  If you click on the words 'Sketch Challenge' above then you will be able to see all the entries for this challenge.  


I also used this particular design in another Stampin' For All challenge.  It was for Sandra Riley's Tic Tac Toe; because my design followed the bottom line of Yellow, Stripes and Thanks.  If you press on Sandra's name you will see all the entries for this challenge too. 


My card design created using this sketch is photographed below:


So to create my design for this card sketch I first cut a card base in yellow card stock (8 1/4 x 5 7/8 scored at 4 1/8").  I then cut (x5) pieces of patterned paper (5 x 3/4") as indicated on the sketch; I adhered these to a layer of white card stock (5 3/8 x 3 7/8") creating the stripes.  There was about 1/2" gap left at the bottom of the white card stock under the stripes; so I looked in my craft stash and found a piece of yellow velvet scalloped ribbon which I adhered with double sided tape to the bottom of the stripes and secured at the back of the white card stock layer.  The bottom of the stripes looked great now but the top of the stripes looked too plain!  

Back to my craft stash, I then found some doilies and one of the small heart shaped ones folded over the top of the striped patterned pieces was great.  The white card stock layer was then adhered to the yellow card base.  

Next I used the Big Shot to cut out (x4) black card stock 'Thanks' before adhering them together.  I adhered this to the stripes using wet glue.  I put Glossy Accents on top of all the letters and sprinkled fine glitter on the top.  (Glossy Accents needs at least 24 hours to dry completely!)  

To complete my card, I stamped the sentiment 'Happy Mail' on the front of the envelope along with the image of the duckling delivering the mail.  This helps the recipient when this falls onto their door mat know that it is not a bill but something nicer!

Thank you for coming to my blog post, I hope you have enjoyed finding out how I created this particular card design.  If you did, please leave me some feedback and I hope to see you again.

Till next time, keep crafting!

Lorraine
:O)


Card Sketch Challenges

Card Sketch Challenges

These card sketch challenges are from the Face Book Group Stamp with Joy for Weeks 27, 28 and 29.  I have got behind on my blog posts so I thought as I had three card designs from the past three weeks that I posted these together.  If you click onto the week number under each sketch you will be taken to the album and you will be able to see all the card entries for that week's sketch.  So let's get going.  Firstly Week 27:


This is my entry for Card Sketch Week 27:


So my entry this week was on a white card base (8 1/4 x 5 7/8" scored at 4 1/8") with a black card stock layer (5 5/8 x 3 7/8") and a white mat (5 3/8 x 3 5/8").  I put the mat through the Big Shot in  the Stampin' Up 'Tufted' embossing folder.  Then I cut out three black card stock scalloped circles (2 3/4, 2 1/2 and 2 1/4").  Also I cut out three white card stock stitched circles (2 1/2, 2 1/4 and 2").  On the white card stock circles I stamped in Stampin' Up Basic Grey ink dandelion images, I also stamped these images inside the card and on the envelope as well.  Two pieces of ribbon were used a black ribbed piece and a white spotty piece; these were adhered on top of the largest circle and behind the embossed white card stock.  The ends were cut at an angle to match the sketch.  To complete my sketch I added the further two smaller circles and embellished my design with some Wink of Stella on a few of the dandelion images.  

Now for Week 28: 


This is my entry for Card Sketch Week 28:


My entry for Card Sketch Week 28 is a little bit different.  I did not want to have a square and a rectangle because I thought this would be too plain.  So I looked in both my stamp and die files to see what else I could use.  I found this teacup die which I had not used before and I thought that it was a good match to the rectangle shape but was a bit quirky too!  So on the Big Shot I cut out the four different tea cups using the die and different coloured scraps of card stock.  I also used some scraps of card stock for underneath the spotty teacups and some brown card stock for the top teacup too.  These pieces then needed to be paper pierced together to create the whole image again.  I found a great patterned piece of card stock for the card base (It looked a bit like Tea Room wallpaper).  I left off the layer card stock in this card design because I felt it was unnecessary.  On a piece of scrap white card stock I stamped the head of 'Millie Mouse' from Inky Antics and I then stamped it again onto the light blue (2 1/4") card stock square and also inside the card on the white card stock.  I coloured Millie's head in using the inks on an acetate block and an Aqua pen.  When the ink had dried I added highlights with my white gel pen. The Postage Stamp shaped Coastal Cabana card stock was gifted to me by Nina Tanner (a crafty pal).  This was ideal to layer the light blue card stock square.  I stamped two sentiments the first onto the blue card stock square which says 'Just For You' and the second one on the bottom teacup saying 'You're Special to me!'  I adhered the two squares together and then adhered these to the top of the card base.  The  Teacups were then adhered to the card base too.  The only piece that had any dimension was 'Millie Mouse', she was popped up on foam pads.  

Lastly here is Week 29: 


Here is my entry for Card Sketch Week 29:


Lastly my entry for card sketch Week 29, this is on a white card base with a light blue layer.  The layer was put through the Big Shot in the "Happy Birthday" embossing folder.  The mats for this design were patterned paper.  So there were two square pieces (2 1/4 and 2 1/2") and two rectangular pieces (4 1/2 x 2") and (4 3/4 x 2 5/8").  The black stars/sprinkles patterned paper was adhered to the blue and white crossed piece and vice versa with the square pieces.  This meant that the sentiment could be embossed onto the blue square.  Embossed in gold embossing powder was "Happiest of BIRTHDAYS TO YOU".  Before the patterned paper shapes were adhered onto the embossed layer a dark pink ribbon was wrapped around starting from the front of the card layer.  In my craft stash I had some gold stars which were ideal for this card sketch.  

All of the envelopes were finished off the same way for each of these card designs.  I stamped the sentiment 'Happy Mail' and stamped the image of the duckling delivering the mail too.  These help the recipient of these cards hopefully to know that they are not bills.

If you have enjoyed this blog post, please leave me some feedback.  Perhaps you could tell me which of my card sketches you liked the best and why?  Thank you for taking the time to read my blog post.

Till next time, keep crafting!

Lorraine
:O)


For The Boys

For The Boys

One of the most difficult type of cards I find to do is masculine cards.  This is possibly because there are so many more stamp sets on the market that are geared towards female or feminine cards; but I was determined to try and make at least one masculine card every week.  I do have friends that are blokes so I do need cards for them too!  

On this particular blog post I am publishing three of my very different masculine cards:  


This first one, the base is a dark brown plaid card stock folded in half with a piece of wood textured patterned paper up the centre.  The mat being a piece of dark red card stock creating a frame for the image.  The image is a technique called 'decoupage' where layers of a picture/image are added using foam pads creating depth and dimension.  (This particular decoupage set was gifted to me by a crafter who was giving up making cards.)  I stamped the sentiment 'Just For You' onto a piece of white card stock and created pennants in both ends, two black rhinestones were used to represent screws.  The final embellishment I used was a piece of burlap across the right-hand top corner. 


This second card was created on a Vanilla card base, I added the geometric shaped patterned paper on top of this with a very small margin (1/16th).  The layer was black card stock and this ran from top to bottom leaving the patterned paper to be seen at either side.  This card was created using transfers (again gifted to me from an ex-crafter).  Transfers come on a sheet and you cut what images you want out and lay these onto the surface they are to go on and using a wooden stick or even your bone folder you rub smoothly until the transfer moves from the sheet to the card stock (Literally 'transfers' from one to the other!)  The images can be overlapped to create a design.  I added transfer images inside the card and onto the envelope too.  On the envelope I transferred a baseball glove and then transferred a baseball into the centre of the glove as though it had been caught.  


This third card was also created on a Vanilla card base but I created a Vanilla frame by cutting out the centre with a stitched rectangle on the Big Shot.  This frame was adhered over the image using foam pads to create depth and dimension.  The images were transferred onto a piece of white card stock.  These transfer images were related to the Sea (again gifted to me).  In order that the Lighthouse and boats looked as though they were on the sea; after I had transferred the images I sponged 'Pool Party' ink lightly around the bottom half of the card stock, I repeated this with sky but I barely touched the card stock leaving it a very pale blue.  There was a gap from the seagull flying and the Lighthouse and I did not have a transfer relevant to put in the space; so I took my black gel pen and I drew a flock of birds flying which completed my image.  I did not want to add a sentiment across the image on this card and in my craft stash I have some adhesive stickers; in which I found some gold stickers in the words 'Happy Birthday' going vertically which were ideal for this project.  I put one either side of the frame.  An image was put inside the card as well.

To complete all three cards, I stamped the sentiment "Happy Mail" onto the envelope along with the duckling delivering the mail to ensure that the recipient of these cards would know that they were fun rather than a bill.  

If you have enjoyed my masculine cards blog post, please leave me some feedback perhaps tell me which is your favourite and why?  Thank you and come back again.

Till next time, keep crafting!

Lorraine
:O)


Stampin' Up In-Colour Showcase

Stampin' Up In-Colour Showcase

Face Book group Stampin' For All had a Colour Challenge set by Helzie Slimm; in which the member were asked to create card designs using the new 'In-Colours' (Lovely Lipstick, Pineapple Punch, Call Me Clover, Blueberry Bushel and Grapefruit Grove).  Helzie had created two designs herself, one where the colours were very subtle and the other when they were as she said 'In Your Face!'.  The choice was ours which we did for the challenge.  I could not decided which to make so I made both.  If you click on the link of Helzie's name you will see the album of all the cards that were made. 

Here are my two card designs: 


The first one is my subtle one, I stamped the MFT seagull image from "Seaside Seagulls" stamp set with Memento ink; then smooshed the in-colour ink onto an acetate block and used an Aqua pen to colour each seagull in with a different colour.  I stamped two seagulls extra and left these blank apart from their beaks which I coloured in black (One of these I adhered inside the card and the other went onto the front of the envelope.)  

I found a light blue card stock in my craft stash and cut this into two pieces to create two card bases (8 1/4 x 5 7/8" scored at  4 1/8").  The layers were cut to (5 5/8x 3 7/8") and the mats in white card stock were cut to (5 3/8 x 3 5/8").  On my 'Be Happy Seagull' card I used my stencils and blending sponges to create a cloudy sky and the waves on the sea.  In the 'Seaside Seagull' stamp set there is a wavy stamp which I stamped with full strength  'Pool Party' ink.  Each of the coloured seagulls were adhered to the waves using foam pads to give them some dimension and to complete this card design I stamped the sentiments 'HELLO', 'BE HAPPY' in the top left-hand corner of the card front.  

For my 'In Your Face' card challenge entry I stamped the balloons and legs with the addition of the stripy skirt from Stampin' Up 'Hand Delivered' stamp set.  I did the same as I did with the Seagulls by smooshing the ink onto an acetate block but this time I waited in between the ink drying and then reapplied more ink to make the colour more intense.  The only additional colour I used on this image was Powder Pink for her legs and arms.  Blueberry Bushel was used to outline the image.  I cut a stitched frame out on the Big Shot and popped this up on foam pads creating depth to the card front.  I also cut out the words 'Big Hugs' 4 times in a dark green card stock, these were adhered together again to create depth.  I cut around the Blueberry Bushel ink when it was dry and then adhered the image to the centre of the frame.  Glossy accents was added to each balloon (this needs 24 hours to dry completely) and when this was dry I added highlights with my white gel pen.  

On both cards I finished off the envelopes with the sentiment "Happy Mail" and the image of the duckling delivering the mail.  The hopefully enables the recipient of these cards to realise that they are receiving 'Happy Mail' not a bill!

If you have enjoyed this blog post, please leave me some feedback.  Thank you for visiting my blog page and I hope you come back again.  

Until next time, keep crafting!

Lorraine
:O)


Week 3

Incredible Like You (2) Second set of 4 cards created from the card kit from Stampin' Up 'Incredible Like Y...