Sunday, 4 February 2018

Thank You Card

Thank You Card


This card is for a special crafty friend to say 'Thank You' for my fabulous birthday packages full of craft products that I can use in future projects.  I have also entered this project into a colour challenge to use Bermuda Bay, Daffodil Yellow and Melon Mambo.  Inspire.Create.Challenge #010 Colour Challenge

To make this project you will need 3 x (4x4") pieces of card stock, each of which needs to be scored diagonally.  Make sure that the points meet and burnish the score line well with your bone folder.  Then position your pieces as shown on the photograph below.  


Two of the (4x4") pieces are side by side but the score lines make a triangle and the other lays on top with the score line vertical.  Make very faint pencil marks where the edges of the top square ends on the bottom squares.   I put 'Tear n Tape' on this area because I find it stronger but you can use the adhesive of your choice and I adhered the top square onto both the other squares ensuring that the score lines would still fold.  I then added a self-adhesive felcro circle to the left hand side far triangle and closed the card pieces into a Tee-pee shape this then adheres the other side of the felcro.

I then cut out clouds using white card stock with my dies on The Big Shot and stamped the hot air balloons in Daffodil Delight for the smaller one and Bermuda Bay for the larger.  I fussy cut these out and with my alcohol markers (the nearest colours to the inks used) I coloured in the balloon decorations to make them more realistic.  I then adhered all the parts to each side of the Tee-pee shape with foam pieces.  For the final embellishment I added some Wink of Stella to the pattern parts of the Hot Air Balloons.

My project is complete.  

Please leave a comment because I would love to know what you think about my project.  Thank you.

Till next time, keep crafting!

Lorraine

:o)

Up Date on Treatment

Chemotherapy

Went for treatment on Friday morning, Simon started my new hand warmer which is to help the Oncology nurses find a vein easier. (not really too keen on getting a PICC). 

Made good time getting to the hospital and found a parking spot straight away and we even managed to catch the lift (well with the help of a kind lady).  Saw Tammy (one of the Oncology nurses) on arrival and said hello just as she disappeared, I had not even sat down before Tammy reappeared and called my name.

I got settled but left my gloves on clutched tightly to my hand warmer  which I'm certain did the trick because I did not have to have my hands in the hot water for long and Tammy got the cannula in straight away 'First Time', off went my blood, now all we could do is wait.

Whilst I was enjoying a Raspberry and Cranberry Tea and biscuits, Simon's rumbling stomach broke the silence, he was contemplating whether to go down to the canteen for a breakfast or wait for dinner and have Steak pie, chips and peas that he had enjoyed last Friday.  He decided to wait for the pie and went on a coffee run to distract his growling stomach (bless him he bought me a packet of crisps, granola yoghurt & bottle of water to go with my lunch).

After about an hour and half's wait Tammy came over to me, it did not look good.  She said that the lab had rung and my Neutrophils were low (0.6) and she was waiting for the Oncology Doctor's decision.  The level that is necessary is normally 1.0 or above so mine being 0.6 wasn't the best.  Some time later, she returned and explained that the doctor was very busy but had said that I couldn't have my treatment today and that they would contact me later in the day to discuss the future plan.

Being very busy herself, Tammy left me to continue nursing the other patients in the bay.  I could feel my eyes welling up, I turned my head away from Simon and wishing them to stop.  Feeling around in my cuffs for a tissue to no avail.  Then I remembered that I had a serviette from my latte which was on the table, by this time tears were silently falling down across my cheeks.  I needed that serviette.  Lisa pulled up the stool and was a great help talking to me as she took my cannula out.  Then it was time for coat on and back on the journey home - minus no treatment!

The reason for me being so upset at not having my treatment this week is because I am on palliative chemotherapy, that is not to cure me but to keep me alive.  So missing it is a huge emotional drain but back at clinic on Tuesday so will know more about what the plan is going forward.  

--------------------------------------------------------------------------------------------------------------------------


It Made me Giggle!

It Made me Giggle!


This joke is from a crafty friend of mine who had put it on their blog page.  I read it and it made me giggle, now I have not laughed or giggled out loud at many things just lately.  But I did at this.  See what you think.

A magician was working on a cruise ship in the Caribbean. The audience would be different each week, so the magician allowed himself to do the same tricks over and over again. There was only one problem: The captain’s parrot saw the shows each week and began to understand how the magician did every trick. Once he understood he started shouting in the middle of the show: 

“Look, it’s not the same hat.” 

“Look, he is hiding the flowers under the table.” 

“Hey, why are all the cards the Ace of Spades?” 

The magician was furious but couldn’t do anything; it was, after all, the captain’s parrot. 

One day the ship had an accident and sank. The magician found himself floating on a piece of wood in the middle of the ocean with the parrot, of course. 

They stared at each other with hate, but did not utter a word. This went on for a day and another and another. After a week the parrot said: “OK, I give up. Where’s the boat?” 
😂😂😂😂😂😂😂😂😂😂😂😂😂😂😂😂😂😂😂😂😂😂😂😂😂😂😂😂😂😂😂😂😂😂😂😂😂😂😂😂

Now for the second thing that made me laugh.  Simon uploaded this video of owls.  Well you have to see it to see if it makes you laugh or maybe its just me.


😂😂😂😂😂😂


Thursday, 1 February 2018

Bunny Knitting

MFTs Colour Card Challenge


This is my entry for the MFTs Colour Card Challenge 86 #mftstamps.  The colours to be used or as near to are:


My card is a Fun Fold.  The base is an Easel card with a light pink layer of corregated card.  Then I adhered pieces of 4 squares in pastel shades straight to the layer.  The bunny knitting with the chicks is decoupage.  The image is where I have found the colours for the challenge apart from the Orange Zest which if you look closely is one of the squares beneath the image.

I used a strip of the pink pastel corrugated card for the stopper inside the card base in order to create the easel shape.  This is where I adhered the sentiment for this card.

Please leave a comment because I would love to know what you think about my project.  Thank you.

Till next time, keep crafting.

Lorraine :o)


Rose Card

Rose (With Love) Card


This card is for a good friend who has just gone through a very big operation, so she needs a pick me up and something a little special.

My good friend Gaynor sent me a selection of goodies for my birthday and as I was going through these (It was a bit like Christmas again), I found this rose die on a piece of Kraft card stock.  So I thought that it would make a wonderful card for Wendy so I initially cut out the sentiment (which I was also gifted by another friend of mine Deana for Christmas) in three different colours, gold foil, silver foil and copper foil to see which colour I preferred.  The gold one was going to be used until I decided to do something with the rose (after a discussion with Simon, my hubby).

So I coloured the rose in with my Prismacolor Coloured Pencils (that I got for my birthday) and then gave the rose a little bit of sparkle with a Wink of Stella.  Then the gold sentiment did not look right so I changed it for the silver one.  I put this layer on foam strips and adhered it to a Kraft card base.  Finally, I added 3 small pearls to the top right hand side corner.

It is finish, all that is necessary now is for me to write inside and send this off to Wendy to help with her recovery.

Please leave a comment because I would love to know what you think about my project.  Thank you.


Till next time, keep crafting

Lorraine  :o)


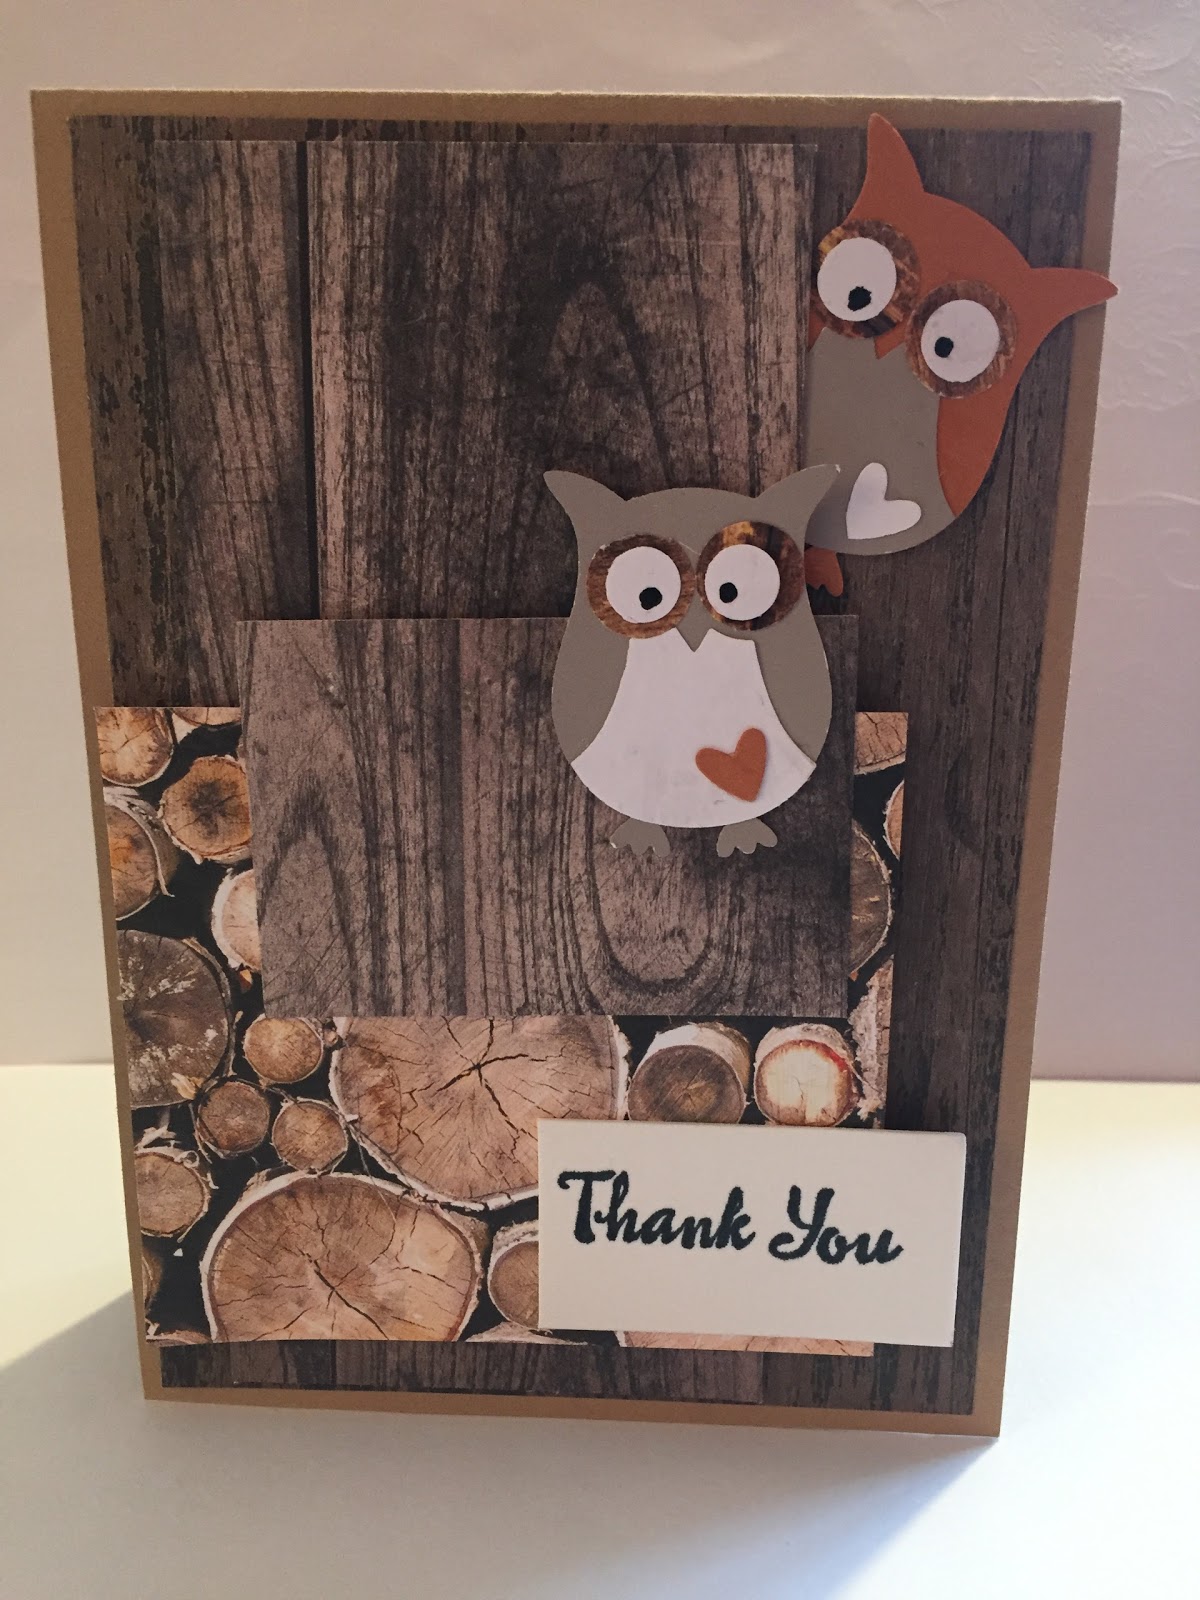
Owl - Thank You Card

Owl Thank You Card


This card helped me 'kill two birds with one stone' if you can excuse the pun!  I needed a card to put in as my entry to Week 5's sketch challenge for Stamp with joy group on Face Book and a Thank You card for Steve from Yorkshire Owl Experience.

I used a Kraft card base and resources from Stampin' Up. The Wood Textures designer series paper (DSP) was cut up in different strips to match the sketch. As you can possible tell one of the owls is representing the star.  I used a retired punch to create the owls (This punch can create many different characters and critters so watch out for more to come!  The sentiment stamp is from the Petal Palette stamp set.

No automatic alt text available.

Till next time, keep crafting.

Lorraine :o)

Shaker Card from Perennial Birthday Card Kit

Birthday Shaker Card


From my previous posts you will have seen that I purchased a Perennial Birthday Project Kit.  This kit has the resources to enable a crafter to create 16 cards (4 different designs).  I initially made up 1 card of each design, I uploaded photographs of these on my blog.  Later I uploaded 3 photographs of cards that I had made from the resources in this kit but these were my own designs.  I then went back to the original designs for the rest of the cards.

When I had finished these,  I had 1 card base left, a sentiment and a white diagonal grid.  I was not sure what to do with these pieces in order to create a card suitable to send out to a member of my family or friends.  Then it came to me - a Shaker Card!  

But I don't like making Shaker Cards, they never seem to work out.  Nevertheless, that is what I set out to do.  I first glued some clear acetate to the back of the grid.  Then I adhered thin foam tape around the back outer edge of the grid.

TOP TIP - I did not have any thin foam tape, just a 2cm wide roll.  So I remembered what Lesley Oman said to do.  I got a piece of relief paper (the piece from the back of stickers etc.) and cut a length of foam tape and put this on the paper.  I then took my steel rule and a craft knife and I carefully sliced the foam tape into 4 thin strips.  I could then take these off the relief paper as I needed it.  I had no sticky scissors either!!  

So I adhered the now thin foam strips around the back edge of the grid, leaving no gaps at all.  I then took my embossing buddy and wiped this around the edge of the foam tape.  I piled an assortment of sequins onto the card base and after taking of the backing from the foam tape I carefully laid the grid onto the card base.  I pressed this down firmly ensuring all the foam tape was adhered to the card base.

Then I attached the birthday sentiment I had left over, with a dimensional at either end so that no adhesive was on the front of the grid.  I glued 3 blue sequins onto the front of the grid and put silver Sparkles in the centres.  My designed Shaker Card was complete.

Please leave a comment because I would love to know what you think about my project.  Thank you.

Till next time, keep crafting!

Lorraine :o)


Week 3

Incredible Like You (2) Second set of 4 cards created from the card kit from Stampin' Up 'Incredible Like Y...