Up-Cycled Tissue Box
Crafting with Dannii's card challenge this week was set on Monday by Sandra. She said that us crafters tend to hoard 'useful' things and this challenge would be perfect for those things. It could be: Buttons that have been recycled, a ribbon that was tied round a gift, some packaging or even toppers from old cards.

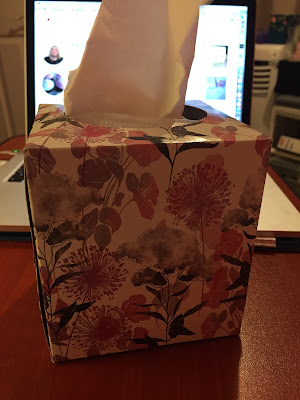
As I reading through the post from Sandra about this week's card challenge I was looking at my box of tissues and thinking what a beautiful pattern it was and how lovely the colours were too. So for my challenge I used my tissue box. I have also Up-cycled the sentiment which came from one of Gaynor Boyce's On Stage swaps she sent to me. I also CASEd Gaynor's Front Step Card which she demonstrated on her YouTube channel on May 9th this year. My completed project is photographed below along with my tissue box.
So first of all I cut the base card (11 x 5 1/2") out of Pink card stock. I popped it into the trimmer on the short side (5 1/2") and came * (1") inwards from the left hand-side and (1") down from the top and then cut from (1" to 6 1/2").** Flipped the card stock over and repeated from * to **. Turn now to the long side (11") and score at (1", 2" and 6 1/2") from the edge of the card stock to the cut line and then from the second cut line to the opposite edge of the card stock. Then score at (5 1/2") between the two cut lines.
Now fold the score lines and burnish. The (6 1/2") is a mountain fold (upwards), the (5") is a mountain fold, the (2") is a valley fold (downwards) and finally the (1") is a mountain fold. Fold the card into two pieces top folding at the (5") score line.
Next cut the layers out of Lilac card stock. I cut (x1) - (5 3/8 x 7/8"), (x1) - (4 3/8 x 3 3/8") and (x2) - (3 3/4 x 7/8").
I had already cut up my tissue box saving as much of the cardboard pattern as possible just in case I would not have enough for the project. On my trimmer I cut (x1) - (4 1/8 x 3 1/4"), (x1) - (5 1/4 x 3/4") and (x2) - (3 5/8 x 3/4").
I used double sided tape to adhere all the pieces together because it is a strong adhesive. So that tissue box patterned card was adhered to the Lilac pieces of card stock and these were then adhered to the different areas on the Front Stepper Card base.
My crafty pal had gifted me her left over swaps from Stampin' Up OnStage at Telford. I gave most of them away but I did try a couple. (They were heart shaped sweet lollipops wrapped in DSP and labelled with a sentiment). I kept the sentiments and the DSP pieces because I couldn't bear to throw them away. Anyway, the sentiment was idea for this project, so I put some foam pads onto the back and placed it towards the top right-hand corner of the card base.
To complete the card I found a piece of (1/8") White ribbon and threaded this from the back of the front panel of the card around to the front and then tied a small bow. I then went to the envelope, I stamped a sentiment "Happy Mail" and a duckling delivering an envelope image so that the recipient of this card would know that it was not a bill! This finished my project.
I would love to know what you think about my project, so please leave a comment. Thank you.
Till next time, keep crafting!
Lorraine
:O)


No comments:
Post a Comment