Thursday 31 May 2018

Embossing and Die Cutting


Embossing and Die Cutting 


I have only been crafting for a couple of year now; I started crafting because I had to leave work due to having terminal secondary breast cancer and from being a busy Head Teacher to doing nothing and being not able to do anything either - I was very bored!  So for my Well-being and Therapy I started card crafting.  My favourite techniques in card crafting have to be die cutting and embossing.  There are so many beautiful dies available now and also the same in embossing folders.  I created the card below using both these techniques together.  


There is not much to the dimension of this card.  It is a Vanilla card base (5 3/4 x 4 1/8") with a further piece of vanilla card stock (5 3/4 x 2").  This smaller piece of vanilla card stock has been put through the Big Shot is an embossing folder.  The cream ribbon has been wrapped around the embossed card stock secured at the back and tied in a beautiful bow at the front.  This piece has then been adhered to the card base using foam pads to give that bit of dimension.  Now as the Big Shot is out, the die cutting can be done all in the vanilla card stock.  First two champagne glasses, then (x3) small hearts, next the word 'Friend' and finally (x3) die cuts of the word 'Congratulations'.  These are adhered together with wet glue to give the look of 3D.  I added cream pearls above the champagne glasses which looked like bubbles.

I love the monochromatic look of this card design, everything just came together and found its place on the card and nothing seemed to look out of place.  My daughter's friend, who had just got engaged was very happy with the card that she was given.  I would certainly make one in this design again.  It's a keeper!!

Thank you for looking at my blog page and this particular design.  I would appreciate any feedback please, thank you.

Till next time, keep crafting!

Lorraine

:O)


One Sheet Wonder (12 x 12") Thank You Cards

One Sheet Wonder (12 x 12") Thank You Cards 

Crafter Gaynor Boyce (and my friend) demonstrated on her YouTube channel how to create 14 cards from one sheet of 12 x 12" patterned paper/card.  I need 'Thank You' cards to thank the crafters for all the handmade cards they have made for the Cancer Card Challenge.  On her blog page she has the diagram for the cutting and full written instructions too.  


I chose a piece of 12 x 12" patterned paper with coloured stars on it so that I could add stars as embellishment on each card too.  I die cut the sentiment 'Many Thanks' (x21) in a light pink card stock and then (x14) in a dark pink card stock.  Each of the sentiments had (x3) light pink die cuts and (x1) dark pink die cut on the top.  In my craft stash I found a white ribbon with the words 'Thank You' running through it and used this on all of the cards in some way as well.  My 14 Thank You Cards are photographed below.  


The insides of the cards were left empty so that there was plenty of space to write to the recipients.  But on each envelope I stamped the sentiment "Happy Mail" and the image of the duckling delivering the mail.  This helps the recipient/s know that when this envelope drops on their doormat that it is not a bill!  

I thoroughly enjoyed making these cards, I would love to know what you think of them too.  Any feedback would be appreciated.  

Till next time, keep crafting!

Lorraine
:O)


Walk Like an Egyptian

Walk Like an Egyptian

Stamp with Joy FaceBook Group has a weekly card challenge for its crafty members.  This week is week 22 and it is a Sketch Challenge as shown below:


My entry for this week's challenge is shown below:


I have the past week been trying to concentrate on designing masculine cards because I generally find these more difficult to create.   For my entry I first cut a Kraft card stock card base (5 5/8 x 4 1/8").  I cut a layer of Black card stock (5 1/2 x 4") which was adhered straight to the front panel of the Kraft card base using double sided tape.  I found in my craft stash a selection of Egyptian patterned paper, images and borders.  So I cut up a piece of the Teal blue patterned paper to layer over the black card stock (5 5/16 x 3 7/8").  I used the borders to create the bottom half of the design.  I die cut a (2") black card stock circle and punched a (1 1/2") scalloped image to go on top of this.  The scalloped image was put on foam pads to give dimension to the card.  

To create the flowers, I used a flower punch, punching out (x3) flowers from the black patterned paper and (x3) from the gold patterned paper.  The flowers were then placed in the palm of my hand and I used a stylus to break the fibres of the card stock; making the sides of the flower shapes go upwards. The two different coloured flowers were adhered together with wet glue and adhered to the left-hand side of the scalloped image.  I put a medium-sized pearl into the centre of each of the flowers.  

On the envelope I stamped the sentiment "Happy Mail" and the image of the duckling holding the envelope.  This helps the recipient/s of this card to know that they are not receiving a bill!

I would love to know what you think of my card project, please leave me some feedback, thank you.

Till next time, keep crafting!

Lorraine
:O)


One Wild Ride - A4 One Sheet Wonder

One Wild Ride - A4 One Sheet Wonder 

For the Stampin FOR ALL Facebook group #stampinforall Vicky Thompson set the DT Challenge (21st May 2018) of 'One Sheet Wonder'.  I wanted to make some masculine cards for my card stash, I decided to a 'One Sheet Wonder' but the Stampin' Up 'One Wild Ride' stamp set does not have any patterned paper that goes with it.  (This was designed by the Stampin' Up demonstrator Dawn Griffiths) So I stamped all the stamps from the set in Black Memento Ink on to the piece of white A4 card stock.  I then went onto YouTube to try and find a crafter who had done a 'One Sheet Wonder' tutorial using a sheet of A4 card stock.  I found Michelle Last who's tutorial is called "One Sheet Wonder Blooms & Wishes from Stampin' Up!' Michelle's blog page has the diagram for how to cut the card stock into 7 pieces that are suitable for making up 7 different cards.  


So I cut up my stamped A4 piece of white card stock as the diagram above instructed and collected (x7) White card bases (5 3/4 x 4 1/8") and corresponding envelopes.  I then die cut (x7) motorbikes in black card stock from a die that had been gifted to me by a crafter called Karen Camposano.  So to put the cards together I had the cut up A4 stamped card stock, die cut motorbikes, silver embossed card stock, more black card stock for layering and silver Washi tape. 


Some of the elements of the card were adhered with double sided tape and some such as the dies with wet glue.  Inside the cards I stamped the tyre track mark and I repeated this on the bottom of all the envelopes as well.  At the top left-hand corner of each envelope, I stamped the sentiment "Happy Mail" and the image of the duckling delivering the mail.  This helps the recipients of these cards to know that they are not receiving a bill!

I really enjoyed my first 'One Sheet Wonder' and I ended up with 7 fabulous masculine cards for any occasion.   I would love to know what you think of my card, please leave me some feedback.  Thank you.

Till next time, keep crafting!

Lorraine
:O)

The Lady in Plaid

The Lady in Plaid


My entry for LeAnne's Sketch Challenge is photographed below:


To create my card design I first cut a White card base (5 3/4 x 4 1/8"), then in my prepared patterned paper I found a piece of multi-coloured plaid (5 6/8 x 3 7/8"); this was adhered with double sided tape straight to the card base leaving a small border.  

Then from my scraps folders I found a piece of Black card stock that I could cut down to (4 x 2 1/2") and another piece (3 1/4 x 1 1/4") to go horizontally.  The plaid pattern was also cut to go on top of the black card stock (3 1/4 x 1").  These two pieces were adhered using double sided tape.  I die cut a red circle (2 1/2"), an white oval (2 3/4 x 2"), a gold sunburst (2") and a white circle (1 3/4").  That is all that needed die cutting.

Next I stamped the lady from Stampin' Up "Beautiful You" onto the white oval and also onto a spare piece of plaid patterned paper.  I then cut out the dress and hat from the patterned paper and with wet glue adhered these to the stamped image.  I cut (x2) black lace (4 x 1/2") and with double sided tape I adhered these to the vertical sides of the largest black card stock.  On the white circle I stamped the sentiment "Enjoy the Simple Things" from Stampin' Up "Botanical Gardens" stamp set.  I also stamped (x3) red hearts from Stampin' Up "Heart Happiness".  On this sentiment I added a pearl that I had coloured with one of my Spectrum Noir Alcohol Marker Pens.  

Now the card had to be put together.  The oval was adhered with foam pads to the black card stock to give the card dimension.  The red circle was adhered flat to the black card stock next.  Then I adhered the black card stock strip with the plaid on top.  Finally, I added the sunburst gold circle with the sentiment also on foam pads.

On the envelope I stamped the sentiment "Happy Mail" and the duckling delivering the mail. This image is to let the recipient of the card know that they have not a bill!  This finished my project.  I would appreciate feedback on this project please, thank you.

Till next time, keep crafting!

Lorraine
:O)


Pretty Little Girl

Pretty Little Girl


My submission for this challenge is photographed below:


I initially created a White card base (5 1/8 x 4 1/8"), found a Pink Gingham layer (5 5/8 x 3 7/8") in my craft stash and I cut a White stitched frame (5 1/4 x 3 5/8") using one my MFTs stitched frames.  Whilst the Big Shot was out I used lots of different coloured card stock scraps to die cut the different parts of the Little Girl and a (3/4") Pink star.  

Now to put the card together, I adhered the Gingham layer with double sided tape to the card base.  The stitched frame and the Pretty Little Girl (after I had glued all the parts together with wet glue) were adhered to the card using foam pads to give the card dimension.  Finally I adhered the star with snail adhesive.  I haven't put a sentiment on this card yet because I want to know who I am sending it to and for what reason and then I will stamp the sentiment inside the card.  

On the envelope, I stamped the sentiment "Happy Mail" and the duckling delivering the mail so that the recipient of this card will know that it is not a bill!  That completed my project.  I would love to receive feedback on this project, thank you.

Till next time, keep crafting!

Lorraine
:O)


Just Magical

Just Magical

A craft friend who watches CCWM on a Friday night's birthday was approaching and she has a particular love of rainbows.  So I decided to make her a birthday card, this would also go towards my current card challenge total of sent handmade cards to family and friends.  So far I have sent 97 of my handmade cards to family and friends either on their birthdays, to say "Thank You" or even to say "Hi".  May seemed to be a particularly busy month of birthday and my card box emptied quickly.  The card below was made specifically for Maria, "Happy Birthday Maria".


So in order to create my card I found a White card base (5 7/8 x 5 7/8"), cut another White card stock layer (5 5/8 x 5 5/8").  Cut (x2) sets of clouds, using my cloud stencil as a template.  I die cut (x7) stitched circles in the rainbow colours starting from red through to blue.  On the White card stock I sponged from the top with Memento Summer Sky ink.  I was gifted the stamped image of the unicorn from another crafter.  I coloured this in with my ARTEZA Watercolour pens and a bit of Wink of Stella for the 'bling'!  On the bottom cloud section I used my embossing buddy to get rid of any marks or grease and stamped with Versamark "Hope Your Day is Magical" from Stampin' Up "Myths & Magic" stamp set.  This was then covered with Silver embossing powder and heat embossed.  

Now to put the card together.  The blue layer was adhered with double sided tape.  The rainbow coloured circles were adhered with wet glue onto the blue sponged layer.  Both the top and bottom cloud cut outs were adhered using foam pads to give the card some dimension.  Finally the Unicorn was adhered to the clouds using wet glue (due to the very intricate, detailed parts of its mane, hooves etc.)

On the envelope I stamped the sentiment "Happy Mail" and the duckling delivering the mail.  This is to ensure the recipient of my card knows it is not a bill!  I would love to know what you think of my card, please leave me some feedback.  Thank you.

Till next time, keep crafting!

Lorraine
:O)

Wednesday 30 May 2018

Squeeze in Please!

Squeeze in Please!

This is first time I have put in an entry to a Stampin' Up Only (SUO) Challenge.  This challenge is #SUOC200 to create a card using Animals/Critters; right up my street as I love critter stamps and dies.  


My design for this challenge is photographed below:


To create my card I used my Stampin' Up 'We Must Celebrate' stamp set.  First I created a Vanilla card base (5 3/4 x 4 1/8"), then cut a Black card stock layer (5 1/2 x 3 7/8") and a piece of patterned paper (5 1/4 x 3 3/4").  I then cut a (1") piece of Black ribbon (3 3/4").  Adhered the card stock and patterned paper together using double sided tape and wrapped the ribbon around the top third of the card and secured it at the back of the card stock.  This was then adhered to the card base using the double sided tape.  Using the trimmer I then cut another Black card stock layer (4 4/8 x 2 7/8") and also another patterned paper layer too (4 2/8 x 2 3/4") and these were adhered together using the tape too and also adhered on top of the ribbon in the centre of the card base.  (It leaves an approximately 1/2" border.)

Now for the image, I cut a piece of White card stock (4 1/8 x 2 1/2") and I used my stamping tool in case I needed to re-stamp any images.  I had already stamped all the images at least twice onto (full sticky) Post-it Notes for masking; the snails I stamped three times for masking.  I fussy cut out all the masks.  (These I have kept in the stamp set case for future stamping.)  So I stamped in Black Memento ink first the three snails, masked them up.  Stamped the hedgehog and squirrel, masked up.  Stamped two more snails and masked using the masks from the snails at the front.  Stamped the rabbit and raccoon and masked up.  Then the two bears, next the raccoon looking in between the bears; then finally the last snail and squirrel.  Whilst the ink was out I stamped a squirrel image inside the card and a row of snails on the bottom of the envelope to continue the theme throughout the elements of this card.

Then using my Prismacolor Colored pencils I coloured all the critters in.  After I used a Black gel pen to brighten their eyes and noses and in a few areas used a White gel pen for highlights.  This was then adhered to the centre of the card using foam pads to give some dimension.  I die cut two shapes for my sentiment from both Yellow and a Peach card stock.  

Next I stamped the sentiment "Happy Birthday" and cut the peach die in half to make the layer behind.  The two layers were adhered using snail and adhered to the card using half foam pads and half snail.  

On the envelope I stamped the sentiment "Happy Mail" and the image of the duckling delivering the mail.  This lets the recipient of this card know that they are not receiving a bill!  My project was now complete.  

I would really like to know what you think of my design, so please leave me some feedback.  Thank you.

Till next time, keep crafting!

Lorraine
:O)


Hello Pretty Lady

Hello Pretty Lady

Retro Rubber's Challenge #87 is 'Let's Get Sketchy' with a given sketch to follow. (See below)


My take on this sketch challenge is photographed below.


So first of all I decided on using this beautiful stamp which I had in my craft stash that had been gifted to me by a crafter who no longer was stamping.  I was unsure how she would stamp but I got a piece of White card stock and put it in the stamping tool; just in case I needed to re-stamp the image.  I did not have to re-stamp the image, it stamped perfectly first time.  All the swirls and curls of her hair, the flowers, birds and even her delicate eye-lashes.  I was impressed.  

Next I had to find something to show off this pretty stamped image.  In my card stock stash I came across a piece of printed card stock (5 3/4 x 3 3/4"), that had roses, butterflies etc. on a very, very pale blue background.  The butterflies tied in with those in her hair, which are tiny but they are there.  I cut a piece of (1/2") Pink ribbon (5 3/4") and adhered this to the middle of the card stock using double sided tape.  I then used a (4 x 2 3/4") oval die to cut out this pretty image.  I also die cut the same oval in Dark Pink card stock, this I trimmed in half so that it would become a frame.  Whilst the Big Shot was out, I die cut 'hello' in Black card stock for the sentiment.

I 'popped' up the frame on foam pads either side of the ribbon, therefore giving me a larger oval on which to place my image.  But before I put this on, I had a piece of ribbon left over so I pierced a hole in this and put in the Pink heart brad.  I then adhered this piece of ribbon straight on top of the other piece.  (This meant that the back of the brad was hidden from view.)  The image was adhered to the Dark Pink oval frame using double sided tape for security.  The sentiment "Hello" was adhered using wet glue and finished off with some Wink of Stella for that added bit of glimmer!  The pretty lady image was finished off with some Copper and Silver Stickles dots.  

On the envelope I stamped the sentiment "Happy Mail" and the image of the duckling delivering the mail.  This ensures that the recipient of my card knows that they are not receiving a bill!

This completed my project.  I would really like to know what you think of my design.  Please leave me some feedback.

Till next time, keep crafting!

Lorraine
:O)


Monday 21 May 2018

Aqua and Lime-Green Dreams

Aqua and Lime-Green Dreams

This week's card challenge from Color Throwdown #493 is to use Aqua, Lime-Green and White in a design.  


My submission for this week's card challenge is photographed below:


To start my card I was certain that I had some coloured card stock that was an Aqua colour.  When I had located this I trimmed it down to create a suitable card base (5 3/4 x 5 3/4").   I then found the musical background stamped image (5 1/2 x 3 7/8") (which had been gifted to me by Georgie Burns) that needed nothing doing to it other than adhering to the card base when the time came.  

Georgie had also gifted me with the stamped images (the guitar, the headphones and the trainers) from Stampin' Up Epic Celebrations.  I used my Spectrum Noir Alcohol Marker Pens to colour in  (x4) sets of headphones, (x4) guitars and (x4) pairs of trainers.  The colours I used were GT2, GT3, LG5 and CG3.  I used a White gel pen to put highlights on the images which also helped them to 'pop' on the card front.  After colouring the images in, I fussy cut them out leaving a small edging of white all around the image.  

I adhered the two pairs of trainers together so that they would look more substantial and glued one set inside the card and the other on the front design.  I hooked the headphones over the top edge of the music score.  Finally, I adhered the guitars to the front panel which finished off the design.  I decided not to put a sentiment onto this card at present as I wasn't sure who it was going to.  I will stamp a sentiment at a later date.  Next I adhered the music score background piece onto the card base using foam pads as this dimension.  

On the envelope I stamped the sentiment "Happy Mail"  and the image of the duckling delivering the envelope.  This, I hope helps the recipient of this card to know its not a bill when it is delivered.  

I would love to know what you think to my design by leaving me some feedback.  

Till next time, keep crafting!

Lorraine
:O)                                                                                                                          

Sunday 20 May 2018

Tea Bag Origami Folding Cards

Tea Bag Origami Folding Cards

After watching one of Gaynor Boyce's YouTube videos showing the cards sent in for my Cancer Card Challenge, I decided to have a go at the Tea Bag Origami Folding that I had seen on some of the sent in cards.  By the way they were stunning so you should go and take a look!  Anyhow, I searched YouTube to find out how to make these beautiful patterns and found a YouTubber called 'Origami Twist' who has a variety of different video tutorials demonstrating from the simplest Tea Bag Fold which is actually a non-fold pattern (I think I have heard it called a Pin-Wheel before now too) right up to very complex folding patterns.  Here is a link to one her earlier videos.  

So below you will see a number of photographs of different cards I have made with the Tea Bag Origami Folding Patterns starting with the Non-Fold one.


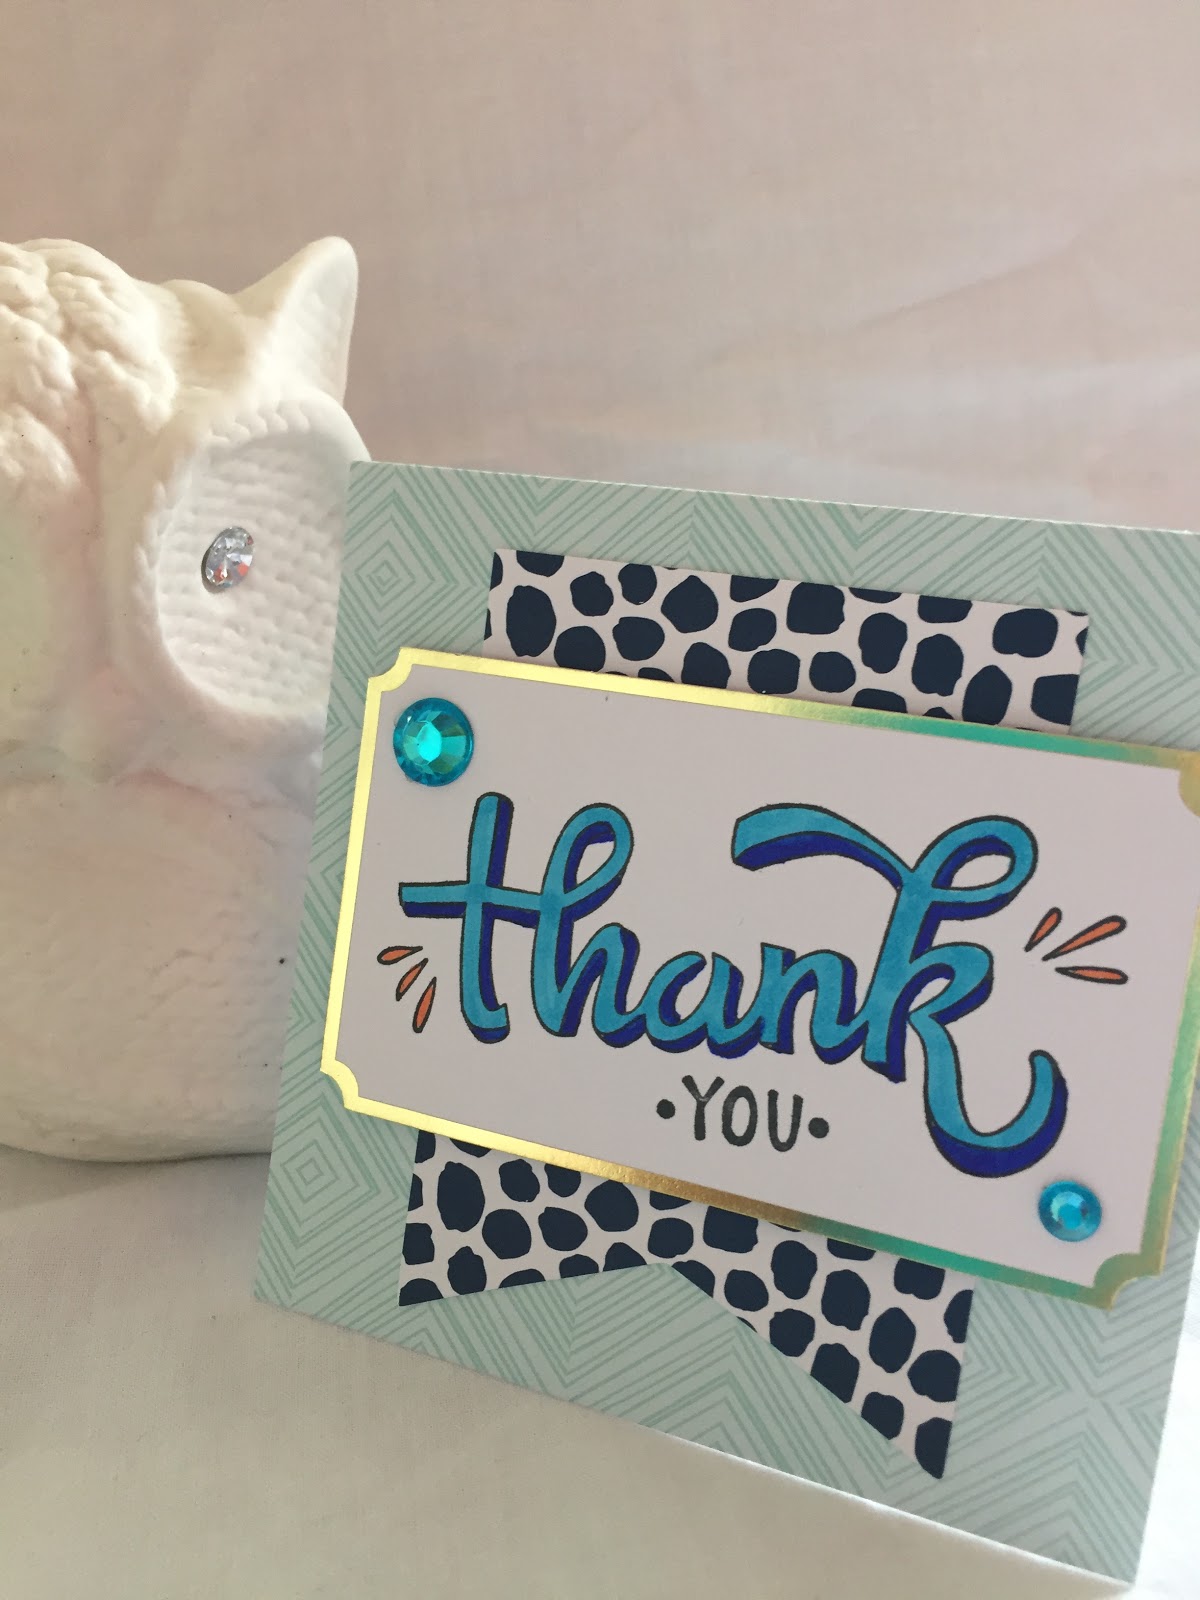
So this Non-Fold Tea-Bag Origami Fold Pattern is on a White card base (5 x 5"), with a Black Floral patterned paper (4 3/4 x 4 1/2") which was adhered straight to the card base.  Then there is a Grey Stitched die cut square (3 1/4 x 3 1/4") which was gifted to me by Nina Tanner and adhered on top of this is the Grey, Black and White Spotty Non-Fold Tea-Bag Origami Fold Pattern.  I adhered a large Grey rhinestone to the middle of the pattern and the sentiment was stamped onto a banner "So happy for you" with a couple of Black rhinestones for embellishment too.


This next card is on Origami Twist's YouTube site named "TeaBag Folding 1".  It is on a Vanilla card base (5 3/4 x 4 1/8") and the next layer is a die cut Blue card stock scalloped rectangle (4 3/4 x 3 3/4) which was gift to me by Karen Camposano.  The TeaBag is created using a Vanilla coloured patterned paper with Red, Green and Blue butterflies on it.  The layers are all adhered straight to each other using double sided tape so give it strength to stay together.  The sentiment on this card was in my craft stash which says "Sending Lots Of Love On Your Birthday" and is 'popped up' on foam pads.  Finished off with three Blue small rhinestones on the top left-hand corner.


This TeaBag is called 'TeaBag Folding 2' on Origami Twist's YouTube Channel  It is on a White card base (4 7/8 x 4 7/8") which a Black, Green and Orange patterned paper background layer (4 5/8 x 4 5/8") which is adhered straight to the card base.  The White doily (4 1/2") is adhered to the patterned paper layer and then the TeaBag Fold Pattern is adhered to the doily with double sided tape for strength.  The embellishment on this card is a White material flower with a clear Rhinestone in the centre.  There is not sentiment on this card at present, when I know who it is going to I will stamp the sentiment inside the card.


This is 'TeaBag Fold 6' on the YouTube channel above.   It is on a White card base (5 x 4 3/4"), which has a Black and White polka dot patterned paper (4 3/4 x 4 1/2") adhered straight to it.  Again there is a White doily (4 1/2") and the TeaBag Fold 6 which measures (4 x 4") is in the same Black and White polka dot patterned paper as the background layer.  The centre has been finished off with a large Black rhinestone and the sentiment was a spare from Stampin' Up Colour Me Happy Card Kit saying "OH HELLO".


It is on a Vanilla card base (4 3/4 x 4 3/4") with a Butterfly patterned paper (4 3/8 x 4 3/8") adhered straight to it.  The White doily (4 1/2") is adhered to the patterned paper and then the Paper Star Medallion TeaBag Fold 3 is adhered with double sided tape onto the doily for strength.  The sentiment "CELEBRATE" again is a spare from the Stampin' Up Colour Me Happy Card Kit and it matched the light blue butterflies on the patterned paper.  I popped this up on foam pads in the centre of the TeaBag Fold.

All the envelopes were completed the same, I stamped the sentiment "Happy Mail" alongside the image of the duckling delivering the envelope.  This I hope ensures that the recipient of my cards knows that they are not getting a bill!  

I hope you have enjoyed looking at the different projects on my blog page and you will visit Origami Twist's YouTube channel to find out how to create your own TeaBags.  Please let me know what you think of my projects, I love to read your comments.

Till next time, keep crafting!

Lorraine
:O)


Saturday 19 May 2018

Stampin' Up - Colour Me Happy Card Kit

Stampin' Up - Colour Me Happy Card Kit 

I was lucky enough to be gifted a Stampin' Up 'Colour Me Happy' Card Kit from a Stampin' Up Demonstrator; I had only one problem I did not have the stamp set 'Colour Me Happy' to be able to stamp the images and sentiments to complete this Card Kit.  Then my crafty pal, Gaynor Boyce came to the rescue; she had the stamp set and sent it up with the cards from the Cancer Card Challenge for me to borrow.  Thank you  Gaynor. x

If you want to see what to do with each card then Stampin' Up have their own YouTube channel and this Card Kit is featured on there.  It is called 'Color Me Happy Card Kit using Stampin' Blends' and was published on November 2nd, 2017.    

The Card Kit makes 16 cards, (x4) Thank you cards, (x4) Oh Hello cards, (x4) Celebrate cards and (x4) So Happy For You cards.  I really enjoyed putting these cards together because there are a lot of different elements to each card design from stamping, colouring images, laying down washi tape, tying bows with Baker's Twine to adding final embellishments like sequins and rhinestones. 

I stamped with Memento Black Ink as was recommended in the instructions and I coloured in the images with my Spectrum Noir Alcohol Marker Pens.  

Below are the photographs of the four different types of cards that can be created with this Card Kit.


I cannot choose a favourite from any of these four cards but the Card Kit has certainly increased my Card supply for next month's (June) 'Birthday', 'Thank you' and 'Hi' cards that I have planned to send out for the Card Challenge I set myself in January 2018.  To date I have sent out 80 of my handmade cards to family, friends and craft friends all with a handwritten note inside to each recipient.  I will continue this challenge until the end of December this year and see what total I get to.  If you would like to receive one of my handmade cards for your birthday, or as just as a "Hi" from me, please let me know your birthday date and a your mailing address through my email: lorraine.turner@me.com or on PM on FaceBook. 

To complete my projects, I went onto the envelopes.  I stamped the sentiment "Happy Mail" and a n image of a duckling delivering an envelope in the top left-hand corners of each. 

I would love to know what you think of my projects, please leave me a comment, thank you.

Till next time, keep crafting!

Lorraine
:O)


Friday 18 May 2018

Beautiful Butterflies

Beautiful Butterflies

The Paper Players Card Challenge PP393 is a Colour Challenge #393 to use the colours below:


My card design using colours as similar to that above as possible is photographed below:


I trimmed a White card stock card base (5 3/4 x 4 1/8") and another White card stock layer (5 5/8 x 4").  The layer I ran through my Big Shot in a embossing folder which has flowers and butterflies on it.  This I adhered to the card base with foam pads.

I then looked through my craft stash to find card stock representing the colours above (Hello Honey, Strawberry Slush, Wild Wasabi and Pumpkin Pie) as near as possible.  I took (x4) different sized butterfly framelits and die cut these on the Big Shot in these coloured card stock pieces.  I also cut the same butterflies shapes in coloured Vellum that I had.  (I have been trying to use Vellum in my card designs as much as possible because I have in the past found it difficult to use.)  I put a little bit of wet glue on the Vellum down the butterflies bodies and adhered the card stock butterflies dies on top.  I left these to dry.

Then I sliced up some foam pads into thin strips to add to the back of the butterflies so that they would be off the dry embossed card stock layer.  I added pearls down the bodies of the card stock butterflies and covered both the Vellum and the coloured card stock butterflies with Wink of Stella to give it some shimmer!

From my Stampin' Up "Colour Me Happy" Card Kit I had a 'Oh Hello' sentiment left over so I layered this onto some green card stock and added strips of foam pads to the back of this and put this at the top right-hand corner of the card.

Inside the card I adhered some more butterflies and when I know who I am going to send this card to I will stamp another sentiment e.g. Happy Birthday etc.

To complete the project, I adhered (x2) die cut butterflies onto the front of the envelope to continue the theme. I was happy with my project now.  So I finished off by stamping the sentiment "Happy Mail" and the duckling delivering the envelope image which I hope helps the recipient of my card realise that they are not getting a bill! 

I would love to know what you think of my project, so please leave a comment.  Thank you.

Till next time, keep crafting!

Lorraine
:O)

Thursday 17 May 2018

CASEd but not CASEd!

CASEd but not CASEd!


This card was created by Stampin' Up in the 2017-2018 Catalogue.  To CASE means to Copy, And Share Everything.  As I looked at the image I realised that I was going to have some problems with this challenge, for a start I do not have the floral stamp image or the stamp blobs or the stamp sentiment!  I also did not have inks that were the ones used by Stampin' Up for this project.  I did though have Green card stock, Wood Textures DSP and Silver Washi Tape. 

So I decided to CASE this card as close as I could with what I had in my craft stash. Below is the photograph of my card that I submitted for the challenge. 


So first of all I cut a Green card stock card base (6 x 4"), a DSP/patterned paper layer from Stampin' Up 'Wood Textures DSP' (5 1/2 x 3 1/2") and a White piece of card stock (5 1/8 x 3 3/8") for the image to be stamped on.  

Now for the stamping, I used my stamping tool so that I had the opportunity to stamp multiple times if I needed to.  First of all I stamped a floral image (A Tiger Lily) on the White card stock in Memento Black Ink.  Then I used a splurge stamp image from Stampin' Up 'Beautiful You' stamp set to stamp the three areas of colour.  The coloured inks used were Memento Dewdrop Sweet Plum, Teal and Bamboo Green.  I stamped the sentiment in Memento Black Ink "WOW YOU'RE INCREDIBLE!" from Stampin' Up "My Hero" stamp set.

I found a piece of Black (1/8") ribbon and a roll of Silver Washi tape.  Now to assemble the card.  The White card stock was adhered on an angle onto the Wood Texture DSP with double sided tape.  Two pieces of the Silver Washi tape were torn off and adhered at the top and the bottom of the White card stock.  The Black ribbon was secured at the back of the Wood Textured DSP and then brought to the front and a small bow was tied to the left-hand side of the card.  To give the card some dimension I put foam pads at the back of the Wood Texture DSP and then this was adhered to the card base.

To complete the project, I stamped the sentiment "Happy Mail" and a duckling delivering an envelope image so that the recipient of this card would know that it was not a bill!  This finished my project completely.  I would love to know what you think of my project, so please leave a comment.  Thank you.

Till next time, keep crafting!

Lorraine
:O)


Up-Cycled Tissue Box

Up-Cycled Tissue Box

Crafting with Dannii's card challenge this week was set on Monday by Sandra.  She said that us crafters tend to hoard 'useful' things and this challenge would be perfect for those things.  It could be: Buttons that have been recycled, a ribbon that was tied round a gift, some packaging or even toppers from old cards.


As I reading through the post from Sandra about this week's card challenge I was looking at my box of tissues and thinking what a beautiful pattern it was and how lovely the colours were too.  So for my challenge I used my tissue box.  I have also Up-cycled the sentiment which came from one of Gaynor Boyce's On Stage swaps she sent to me.  I also CASEd Gaynor's Front Step Card which she demonstrated on her YouTube channel on May 9th this year.  My completed project is photographed below along with my tissue box.  


So first of all I cut the base card (11 x 5 1/2") out of Pink card stock.  I popped it into the trimmer on the short side (5 1/2") and came * (1") inwards from the left hand-side and (1") down from the top and then cut from (1" to 6 1/2").**  Flipped the card stock over and repeated from * to **.  Turn now to the long side (11") and score at (1", 2" and 6 1/2") from the edge of the card stock to the cut line and then from the second cut line to the opposite edge of the card stock.  Then score at (5 1/2") between the two cut lines.

Now fold the score lines and burnish.  The (6 1/2") is a mountain fold (upwards), the (5") is a mountain fold, the (2") is a valley fold (downwards) and finally the (1") is a mountain fold.  Fold the card into two pieces top folding at the (5") score line.  

Next cut the layers out of Lilac card stock.  I cut (x1) - (5 3/8 x 7/8"), (x1) - (4 3/8 x 3 3/8") and (x2) - (3 3/4 x 7/8").

I had already cut up my tissue box saving as much of the cardboard pattern as possible just in case I would not have enough for the project.  On my trimmer I cut (x1) - (4 1/8 x 3 1/4"), (x1) - (5 1/4 x 3/4") and (x2) - (3 5/8 x 3/4").

I used double sided tape to adhere all the pieces together because it is a strong adhesive.  So that tissue box patterned card was adhered to the Lilac pieces of card stock and these were then adhered to the different areas on the Front Stepper Card base.

My crafty pal had gifted me her left over swaps from Stampin' Up OnStage at Telford.  I gave most of them away but I did try a couple.  (They were heart shaped sweet lollipops wrapped in DSP and labelled with a sentiment).  I kept the sentiments and the DSP pieces because I couldn't bear to throw them away.  Anyway, the sentiment was idea for this project, so I put some foam pads onto the back and placed it towards the top right-hand corner of the card base. 

To complete the card I found a piece of (1/8") White ribbon and threaded this from the back of the front panel of the card around to the front and then tied a small bow.  I then went to the envelope, I stamped a sentiment "Happy Mail" and a duckling delivering an envelope image so that the recipient of this card would know that it was not a bill!  This finished my project.

I would love to know what you think about my project, so please leave a comment.  Thank you.

Till next time, keep crafting!

Lorraine
:O)


Bounty of Butterflies

Bounty of Butterflies


My card design using this sketch is photographed below:


So to start off with I created a Vanilla card stock base (5 3/4 x 4 1/8") and another piece of  Vanilla card stock (5 3/8 x 4").  This piece I dry embossed in the Big Shot with the Stampin' Up 'Layered Leaves' Dynamic Textured Impressions Embossing Folder and then adhered it straight to the card base using double sided tape. 

Then on the trimmer, I cut a piece of Green DSP/Patterned Paper (5 1/8 x 2 3/4") into a large rectangle.  I cut three smaller rectangles out of a Flower and Green patterned papers (3 1/2 x 7/8"), a Red Spotty patterned paper (3 7/8 x 1 1/4") and a Butterfly patterned paper (3 3/4 x 1 1/2").  On one end of each rectangle I flagged it creating (x3) banners.  I adhered the banners onto the embossed layer using double sided tape as shown in the sketch and the same with the largest rectangle too.  I had a small piece of the Flower patterned paper left over so I created another banner (3 1/2 x 1 1/8") and adhered this at the bottom of inside the card.  

I still wasn't happy with the card so I went to look in my craft stash for a sentiment.  I found a banner 'THANK YOU" sentiment that was ideal for this project and I adhered this diagonally at the bottom right-hand corner of the large Green rectangle.  I decided I needed an image/s of some sort, so I went looking again in my craft stash.  I came across some E-Z Transfers of some butterflies, which had been gifted to me by another crafter but I had never used before.  I read the instructions and decided to give it a go.  If it went wrong then the card would be ruined and I would have to start again.  First I transferred some flowers vertically on the Green rectangle (You lay the transfer sheet where you want the transfers and then with a wooden stick you rub gentle across the back of the acetate releasing the transfer image onto the surface of the patterned paper.  It was working well, no real problems so after the flowers I decided to use some of the butterflies because they were really detailed and beautiful.  I even put one on the banner inside the card and (x2) on the envelope too!

I was happy with my project now.  So I finished off by stamping the sentiment "Happy Mail" and the duckling delivering the envelope image which I hope helps the recipient of my card realise that they are not getting a bill!  

I would love to know what you think about my projects, so please leave a comment.  Thank you.

Till next time, keep crafting!


Lorraine

:O) 


May Flowers

May Flowers


My design for this card challenge is photographed below:


I could not tell you how old the stamp is that I used but I have been crafting for over a year now and I was gifted this by a lady who was giving up card crafting.  So it seemed ideal for this week's theme challenge.

Initially I cut a card stock base (5 3/4 x 4 1/8") from a White card stock which has a Lilac flower lined pattern on it.  I then cut a layer from Lilac card stock (5 4/8 x 3 3/4") and also a piece of White card stock (5 3/8 x 3 4/8").  Whilst the trimmer was out I also trimmed a piece of the Lilac scrap card stock (5 3/8 x 1/2") and a piece of Teal card stock (2 1/2 x 1/2") for the sentiment. 

Now for the stamping, I used my stamping tool because I could stamp a 2nd time if the image wasn't strong enough.  I stamped in Stampin' Up 'Real Grey' ink all over the White card stock in no particular pattern and even over the edges.  Then allowed this piece to dry a little.  I stamped the sentiment in the same grey ink "CELEBRATE" and put this to one side.  

Now for some colour, I used my  Arteza Watercolour Marker pens to put some colour onto the edges of the petals and then with my Aqua pen draw the ink into the flower image creating blending of the colour.  I used different shades of Purple/Lilac for the flowers and used the darkest of the pens for the middles. The only other colour used was a Yellow pen for the centres of the flowers.  I then left this to dry a little.  

I cut a piece of Cream lace (5 3/8") and adhered this to the Lilac card stock strip with double sided tape.  The flower images were adhered to the Lilac card stock layer using double sided tape as it is stronger when card stock may have warped with the use of watercolours and water.  The Lilac card stock strip was adhered across the centre of the top layer horizontally; again with double sided tape.  The sentiment was adhered to the centre of this strip as well.  To give the card some depth the Lilac card stock layer was adhered to the card base using foam pads.  

I added (x5) purple sequins with wet glue and put lilac rhinestones inside the sequins as well.  This completed the project apart from the envelope.  On the top left-hand corner I stamped the sentiment "Happy Mail" along with a duckling delivering an envelope image.  This helps the recipient of my card to know that they have not got a bill!  Now my project was complete.

I would love to know what you think about my projects, so please leave a comment.  Thank you.

Till next time, keep crafting!


Lorraine

:O) 


Monday 14 May 2018

Daisy, Daisy!

Daisy, Daisy!

Stampin' FOR ALL had a Design Team Card Challenge which was to Case a project from an overseas Demonstrator 7th - 12th May 2018.  

I chose Kelly Acheson "A Stamp Above", a Stampin' Up Demonstrator from the USA.  Kelly did a video tutorial on her YouTube channel called "Rainbow of Daisies" on the 12th April 2018.  I watched Kelly's video tutorial and I tried to CASE (Copy And Share Everything) her design as much as possible but I haven't got all the resources Kelly has so a few things are different.  But generally I was happy with the final card that is photographed below:


So to create this card I first cut a Berry Burst card base (5 3/4 x 4 1/8"), the I cut (x2) Vanilla card stock layers (5 5/8 x 4") and I cut a piece of Stampin' Up Wood Textures DSP/Patterned paper (5 3/8 x 3 6/8").  I then adhered one of the Vanilla pieces of card stock directly to the card base using double sided tape.

Next I stamped (x2) Daisy flower images in Stampin' Up "Berry Burst" onto some scraps of paper which was somewhat like the Berry Burst card stock colour.  Then I stamped (x2) centres for the flowers in Memento Dewdrop Rich Cocoa ink on some scraps of brown paper; these I punched out using my (1/2") circle punch.  I then cut the daisy images in half and with wet glue adhered the two halves together and then adhered the centres on too.  I added a foam pad to the back of both flower heads.  Then with the "Rich Cocoa" ink again, I stamped (x2) stems on the Wood Texture DSP and then adhered the flower heads.  I used the same ink to stamp the sentiment "Thank You" inside the card.  I stamped a different flower head image in "Berry Burst" inside the card.  This flower head was also stamped on the front of the envelope with a green stem stamped in Memento Dewdrop "Bamboo Leaves" ink.   Using the "Rich Cocoa" ink again, I stamped the sentiment "Your thoughtfulness brightened my day" on some scrap Vanilla card stock; this I die cut using an (2 x 1 1/4") oval die. I stamped the 3 flower image under the sentiment.  I cut another oval using some scrap Berry Burst like card stock.   This was cut in half and layered behind the sentiment.  These two pieces were adhered together using double sided tape and put on foam pads for the completion of the card.

I cut some lace (1/4") and I adhered this to the lower half of the Wood Textured patterned paper.  Now I put the card together.  The Vanilla layer was adhered to the Berry Burst card stock with double sided tape.  The Wood Texture DSP/patterned paper was adhered to the Vanilla layer.  The oval sentiment was then adhered over the lace.  The other piece of Vanilla card stock was adhered inside the card with double sided tape.


That completed the front and inside the card.  Next I stamped the sentiment "Happy Mail" on the top left-hand corner of the envelope.  I also stamped the image of a duck delivering an envelope there too. This helps the recipient of my cards know that they are not receiving a BILL and completed my card!

I would love to know what you think about my projects, so please leave a comment.  Thank you.

Till next time, keep crafting!


Lorraine

:O) 

Week 3

Incredible Like You (2) Second set of 4 cards created from the card kit from Stampin' Up 'Incredible Like Y...