Wednesday 25 April 2018

Beautiful You - uoY lufituaeB!

Beautiful You - uoY lufituaeB!


My take on this card challenge was this:


So I found a White ready-made card base (5 3/4 x 4") in my craft stash.  Then I went into my scrap folders to see what patterned paper I could find that would be suitable for this design.  This Dark Blue spotty patterned paper was ideal; as the spots were white and would tie in with the card base and the middle of the card as well.  So I trimmed a piece (5 5/8 x 3 3/4") and adhered this straight to the card base using snail adhesive.

With the Big Shot I die cut an oval out of White card stock (4 x 3").  I used my stamp positioner tool for stamping to ensure I got a good image.  I used one of the images from Stampin' Up "Beautiful You" stamp set.  Stamping the image on the right-hand side of the oval first.  Then I stamped the same image onto my Silicone mat, turned the Silicone mat over (with the stamped image on the underside) and placed the image onto the left-hand side of the oval and very gently rubbed the back of the Silicone mat.  The image transferred from the Silicone mat onto the card stock but in the 'Mirror image form'.  Next I stamped the sentiment "So Happy For You" which also comes from the 'Beautiful You' stamp set.

I had a 'mirror image' which was the requisite for the card challenge but I wanted more for my card design.  I had some of the spotty patterned paper left, so I put this into the stamp positioner tool and stamped the image again on this.  I also stamped the image again onto the Silicone mat and turned this around and stamped it onto the spotty patterned paper so that I got a 'mirror image' as well.

Then I carefully fussy cut out both dresses and hats and then with wet glue adhered these to the images I had first stamped.  I was so pleased with the outcome, the design just popped!  To finish off the front I put 3 black rhinestones up in the top right-hand corner.


On the inside of the card, I stamped the image in the right-hand side bottom corner.


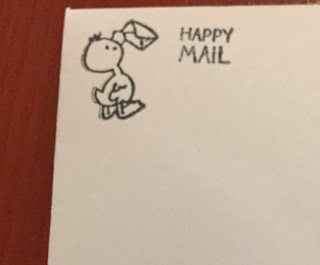
On the envelope, I stamped two of the images in the bottom right-hand side corner.  I also stamped the duck with the envelope and the sentiment 'Happy Mail' so that my recipient would know that this was not a bill!  This completed my project.  

I would love to know what you think about my project, so please leave a comment.  Thank you.

Till next time, keep crafting!


Lorraine


:o) 

Puppies Galore!

Puppies Galore!


My take on this Sketch challenge is shown below:


So initially to start my design I found a White ready-made card base (5 3/4 x 4 1/8") and then I trimmed another piece of White card stock to (5 1/2 x 3 3/4"); I dry embossed this with my 'Dog Paw Print' embossing folder.  I then found a piece of Teal card stock in my scrap folder and trimmed this to (5 1/4 x 2) and then with the smallest paw print stamp; I stamped it with Black Memento ink randomly all over the coloured card stock.

Next I punched out (x3) White card stock scalloped circles (1 1/8"); (x3) Orange glitter card stock scalloped circles (1 1/4") and (x3) White card stock circles (1 1/2").  On the smallest scalloped circles I stamped 3 different images of the puppies from the 'Honey Bee Stamps' - "Playful Pups".  I used my embossing buddy first and then held the scalloped circle in my stamp positioner tool and stamped the image with Black pigment ink.  I then straight away, sprinkled the image with Clear embossing powder and heat set it with my Heat Gun.  This process was repeated with each of the three images in the scalloped White circles.  I used a scrap piece of White card stock to do the same process as above with the images (a dog water bowl, a bone and a ball).  All of which I fussy cut out when they had cooled down.  On a piece of White card stock (1 3/4 x 1 1/8") I used the same process when I stamped out the dog's bed too.  This though was not fussy cut out, it was adhered to a piece of the Glitter paper (1 7/8 x 1 1/2").

The circles were all adhered one on top of each other starting from the largest White circle, then the Glitter scalloped one and finally the White scalloped circle with the stamped images of the puppies.

The final part of the sketch to do was the banner.  So I trimmed a piece of Glitter card stock to (2") wide and a White piece of card stock to (1 3/4") wide.  Put both the ends together and cut a banner end into both pieces at the same time; ensuring that both pieces of card stock had the same shape banner ends.  These then were adhered together with strong double sided tape.

Now to assemble my card.  I used strong double sided tape throughout this design because of the Glitter card stock and the Dry embossing too.  So the embossed piece of card stock was adhered to the card base first.  Then I adhered the banners to the left-hand side of the card base.  I then realised that the Teal card stock would need to be adhered with foam tabs because it was going on top of the banners and the embossed card stock and these were different heights.  I left a small margin of white around the top edge.  The circles were then added to the Teal card stock evenly spaced out.  The rectangle of Glitter card stock with the dog bed image was adhered to the bottom right-hand side of the card design.  This just left my fussy cut images, I cut small pieces of the double sided tape off the roll and adhered these onto the banner.


Inside the card I stamped a sentiment from the Honey Bee Stamps "Playful Pups" which said "Big HUGE Thanks" and I then stamped the largest Pup stamp next to this as well.


On the envelope, I stamped a line of paw prints along the bottom edge and the "Happy Mail" sentiment and the duck with the envelope which hopefully indicates to my recipient that this is not a Bill!  This then completed my project.

I would love to know what you think about my project, so please leave a comment.  Thank you.

Till next time, keep crafting!


Lorraine


:o) 

Heat Resist - Amazing You!

Heat Resist - Amazing You!

My Face Book Group - Stampin' For All had a Card Challenge called "Heat Resist Card Challenge".  This is my submission for this challenge.


Initially I trimmed a piece of Kraft card stock (5 3/4 x 4") and stamped the flower from Stampin' Up stamp set "Amazing You" onto this using Versamark; not forgetting my embossing buddy.  I covered this with WOW White embossing powder and heat set it with my Heat Gun.  Then I used Stampin' Up Berry Burst ink smooshed onto an acetate block and an Aqua pen to colour in the flowers.  I used LuminArte "Mediterranean Blue" which has a lovely glimmer to it for all around the flowers.  Whilst the heat gun was out I found a piece of Black card stock (5 1/2 x 1/4") in my scrap folder and after using my embossing buddy, I stamped the sentiment with Versamark "Sending You Smiles Through The Miles" and embossed this with White embossing powder too.  

I trimmed a piece of Rose coloured fun foam (6 x 4 3/8") for the layer under the Kraft card stock.  I used my corner rounder on each corner of the mat, the layer and the White card base (6 x 4 3/4").  Now to assemble the card.  Because this card sentiment says "Sending You Smiles Through The Miles"; I probably will be sending it to one of my crafty pals abroad so I did not want it to have too much depth (because of postage costs etc.)  So each layer is adhered straight on top of the other using strong double sided tape.  I adhered the mat and the fun foam layers first and then adhered a piece of (3/4" wide) Rose coloured ribbon across the full width of the image and secured this at the back of the fun foam.  The sentiment was then adhered to the ribbon and for a burst of colour I made a Teal bow and added this to the right of the sentiment.  These layers were then adhered to the card base.


To continue the theme of the card, I stamped the flower image using Black Memento ink inside the card base at the bottom right-hand side.


This was repeated on the front of the envelope too; along with my duck holding the envelope and the sentiment 'Happy Mail' to let the recipient know that this is not a Bill!  This completed my project.  

I would love to know what you think about my project, so please leave a comment.  Thank you.

Till next time, keep crafting!


Lorraine


:o) 

Tuesday 24 April 2018

RAK - Random Acts of Kindness

RAK - Random Acts of Kindness

I have only recently joined the Face Book Group 'RAK' which stands for Random Acts of Kindness.  This is where card crafters from around the world can send a hand-made card using Stampin' Up products to any other member of the group.  

When I found my recent RAKs on the door mat after the Postman had been; I was beaming from ear to ear when I realised that they were RAK cards.  The first to arrive was from the lovely Shannon Aydukovic in the USA.  Shannon told me in her note that she was sending me a RAK because we were both new to the Face Book group.


The second one arrived today all the way from Canada.  Bonnie Sanche sent this one to me with a note attached which said "I hope this card travels safely from Calgary, Alberta, Canada to bring you a smile."  At the base of the note was "No act of kindness, no matter how small, is ever wasted - Aesop".


Both beautiful cards ladies, thank you both. 

Lorraine 
heart-and-crafts.blogspot.co.uk

:O)


Tuesday 17 April 2018

Rose after an April Shower

Rose after an April Shower


My take on this challenge is this:


I looked at the Theme Challenge #84 'April Showers' and thought that I did not have any stamps that were older than a year that would be suitable; such as welly boots, umbrellas etc.  Then I remembered that April Showers support the growth of the flowers in our gardens and I found an old stamp of a Rose.  I stamped this onto White card stock using Stazon Black ink because I wanted to use my ARTEZA watercolour markers.  

In my craft stash I found a ready-made White card base (5 3/4 x 4") and I punched a rose scalloped pattern into the right-hand edge.  On the inside of the card I adhered a red ribbed ribbon to the right-hand  (5 3/4 x 1 1/2") edge so it would be seen through the punched pattern.  I then used my ARTEZA watercolour markers to colour the rose and the stem in.  I then left this to dry completely.  

I used my embossing buddy at the bottom of the front panel of the card base and then stamped with Versamark the sentiment which was "The most Beautiful things in the world cannot be Seen or Heard but felt from within the Heart" and added silver embossing powder and then heat set it.  

The rose was now dry and so I could fussy cut it out and it was adhered straight onto the front panel using wet glue.  I added Wink of Stella to give it some bling to look wet (so it would look like after an April shower) and I adhered 3 raindrop rhinestones onto the rose as well.


On the front of the envelope I stamped the sentiment 'Happy Mail' and the Duck holding the envelope so the recipient of this card will know it is not a bill!  This completed my project.

I would love to know what you think about my project, so please leave a comment.  Thank you.

Till next time, keep crafting!


Lorraine

:o) 

Monday 16 April 2018

Hip, Hippo, Hooray!

HIP, HIPPO, HOORAY!


My take on this Sketch is as below:


To create my card design I first sourced a White ready-made card base (5 x 5") with a (3") aperture and the put this through The Big Shot to dry emboss the front panel using the "Dots" embossing folder.  Whilst the Big Shot was out I die cut a Dark Pink circle (3 1/4") and a scalloped circle  (3 1/2") in Vellum.  

Next I used my stamp positioning tool to stamp all the images I needed using the MFTs "Hippos and Chicks" stamp set (3 x different Hippos, a set of balloons and a cake.)  I stamped the sentiment "HIP, HIPPO, HOORAY!" in Stazon Black ink onto vellum (2 3/4 x 1").  I coloured these with my Prismocolor Pencils and blended the pencil lines with Zest bending solution.  I 'fussy cut out my images and added black edging where cutting had left the edge stark White.  To bring out the Hippos' eyes I went over these with a Black gel pen and also added some highlights with a White gel pen.  I cut some black embroidery thread to use as the balloon strings as I had cut them off when fussy cutting the balloons out.  

I used my Martha Stewart punch to punch out two strips of Purple foils card from my scraps folder.  Now all the elements were complete it was time to put my card design together.  

First the Dark pink circle was adhered into the circle aperture.  The sitting Hippo and cake were adhered to this with glue dots.  Putting a small amount of wet glue around the outer edge of the circle aperture meant that the vellum scalloped circle would adhere without leaving too much adhesive showing.  The two punched patterned pieces were adhered to the card stock base using wet glue too.  The Vellum with the sentiment was also adhered using wet glue, just a small amount in each corner (which was covered later).  The other two Hippos were adhered with glue dots too.  Their party hats were adhered though with wet glue as was the balloon strings to the Hippo's arm.  

Finishing touches were to add some circular coloured stickers to cover the adhesive spots under the corners of the vellum with the sentiment and in other areas of the card design too.   Glossy Accents was put onto the balloons and the Hippos' party hats to give them some dimension.                                                                                                                                                                                                                                                                                                                                                              

To carry on the theme of the card, I stamped the Hippo with the present onto the envelope on the right-hand bottom corner.  Whereas the sentiment 'Happy Mail' and the Duck delivering the envelope were at the top left-hand corner which helps the recipient realise that this is not a bill!  This completed my project.

I would love to know what you think about my project, so please leave a comment.  Thank you.

Till next time, keep crafting!


Lorraine

:o) 

Sunday 15 April 2018

Grandson's 2nd Birthday Card - Knight and Dragons

Grandson's 2nd Birthday Card - Knight and Dragons


To create this card design you will need Stampin' Up 'Myths & Magic' designer series paper (DSP) and 'Magical Day' stamp set.

Initially I created a side opening card with Dark Blue card stock (5 3/4 x 5 1/2") on my trimmer and then I cut a piece of blue glitter foam (5 1/2 x 5 1/4") and a further piece of Light Blue card stock (5 1/4 x 5").

Now the layers were cut, next came the images.  First I fussy cut two flying dragons out from the (DSP), a Knight and 1 whole Castle and 2 partial Castles.

On my Big Shot, I used my letter dies to cut out 'Brooklyn' using the (DSP) but the reverse side which is Grey with arrow heads on it.  Also I die cut a numeral '2' in the same (DSP).  I die cut 1 large White cloud, 1 medium and 2 small.  I die cut 4 hills with trees out of Light Green card stock.  On 2 of the pieces I cut the trees off and just left the curve edge of the mounds.

Now it was time to start constructing the card front.  I used wet glue in most instances but I did use Stix2 double sided sticky foam for the Knight and the Slayed Dragon at the bottom front of the card base.   The clouds and the lettering were adhered first at the top of the Light Blue card stock and the Blue dragon was adhered next with its wing tucked inside one of the "O" of Brooklyn.  Then the first 2 hill side edges were adhered one with trees and one without; this one the Castle was adhered to.  The the final two pieces of hill edges were adhered.  The numeral '2' was adhered in the bottom right-hand corner of the card stock.  The backing from the Knight and the Orange dragon were removed and these were adhered to the card stock to; this completed the image scene.  I used a black gel pen to put 'B & T' onto the Knight's shield and to close the slayed Dragon's eye too.


To continue the theme inside the card, I used the stamp set and stamped with Memento Black ink a dragon and a Knight.


Onto the envelope, I stamped another Knight and my 'Happy Mail' Sentiment and the Duck delivering the envelope so that the recipient of this card knows it is not a bill!  This completed my project.

I would love to know what you think about my project, so please leave a comment.  Thank you.

Till next time, keep crafting!


Lorraine

:o) 

Delicate Sewn Flowers

Delicate Sewn Flowers

The Color Throwdown Colour Card Challenge #488 this week is Yellow, Green, Aqua and White.


My card design for this Colour Card Challenge is as below:


To create my design I used the following inks: Stampin' Spot (Daffodil Delight), Memento Dewdrop (Summer Sky) and Memento Dewdrop (New Sprout).

First I sourced a White ready-made card base (4 3/4 x 4 3/4") and on my trimmer I cut another piece of White card stock (4 1/2 x 4 1/2").  On this piece of card stock I stamped a single 5 petal flower head in the 3 colours (yellow, blue and green) using the inks as listed above.  

I had been gifted a selection of die cut stitched card stock and I decided to use the Grey stitched piece (4 x 4").  The selection of die cut card stock was packaged beautifully in a striped bag with the scalloped label with the sentiment 'Especially For You'.  This was a great fit for the bottom of the Grey card stock; so I pierce 2 holes into the card stock so that the White ribbon could be threaded through from the back, one end through the label and a bow tied to hold it.  But before this could be completed I had to stitch the flower bead on.  

I used my piercing mat and created holes to sew into to form the stems and leaves of the plants with Green embroidery thread.  As I sewing back-stitch, every so often I would thread either a yellow, or blue or green single-flower head bead onto the needle and sew this into the design.  (The beads were also a gift to me from a different friend.  

Before putting the final touches to my card design, I adhered the label down with double sided tape.  Tied the bow and cut off the long tails; creating a neat small bow.  Then I added double sided tape to the back of the Grey card stock to adhere this to the stamped White card stock.  The stamped White card stock was adhered to the main card base using foam pads to give the card some dimension. 


To continue the theme of the card inside, I used another of the gifted die cut stitched card stock pieces also in grey but this had a single line of stitching (1 3/4 x 1/2").  I repeated the same as the front piece, piercing the holes using a pokey tool and a piercing mat and then sewing a stem, leaves and threading on a couple of single flower heads.


I stamped the envelope with the same single headed flower stamp in the 3 colours (yellow, blue and green) and also my 'Happy Mail' sentiment and Duck carrying the envelope so the recipient of this card will know that it is not a bill!  This completed my project.

I would love to know what you think about my project, so please leave a comment.  Thank you.

Till next time, keep crafting!


Lorraine

:o) 

Thursday 12 April 2018

Three Little Butterflies

Three Little Butterflies

The Face Book Group 'Stampin' For All' this week put out a Card Case for all its members to have a go at.  This Sketch is this one:


My take on this sketch is this:

So in order to make my project initially I got a Vanilla ready-made tatty-edged card base (6 x 4") from my craft stash.  I then found quite by change 3 butterfly embellishments in my stash too; which would be ideal to represent the circles on the sketch.  The embellishments were Vanilla zig-zag edged circles, with an orange smaller circle on top completed with a blue butterfly shape.  

Next I looked in my card stock to find a blue that was similar to that of the butterflies and luckily I found some which was a very near match!  Using my trimmer I trim a piece of Blue card stock (5 1/2 x 3 3/4").  Then in my Vellum folder I found some Blue vellum with silver butterfly outlines on it.  So I trimmed a piece (2 x 5 1/2").  I adhered the butterfly embellishments to the vellum using the adhesive foam pads on the backs.  Then I turned the vellum over and where the backs of the embellishments showed through the vellum I added strong double sided tape.  This was removed in order to adhered the vellum to the card stock.  The card stock was then covered with thick foam strips and adhered to the front of the card base.  3 rhinestones were added to the centres of each butterfly to form a body. 

In my Cream/Vanilla scraps folder I found a piece of card stock (3 x 1/2") ideal for a sentiment.  First I used my embossing buddy all over the card stock strip then I stamped the sentiment "JUST FOR YOU" in Black pigment ink onto the card, immediate covering this with clear embossing powder.  The powder was then set with a heat gun.  The process was repeated from the embossing buddy, but this time I stamped two butterflies in the ink and these were set with the heat gun.   A banner was cut into the left-hand side of the card stock and it was adhered to the right-hand side of the card base below the vellum with double sided tape.


Whilst the inks were out, I stamped 4 butterflies in a row and the sentiment "YOU'RE IN MY THOUGHTS" inside the card.


The same 4 butterflies were stamped on the bottom left-hand side of the envelope and my "Happy Mail" sentiment along with the duck holding the envelope so that the recipient knows that this is not a bill!  This completed my project.

I would love to know what you think about my project, so please leave a comment.  Thank you.

Till next time, keep crafting!


Lorraine

:o) 

Monday 9 April 2018

Spring Flowers

Spring Flowers


My take on this challenge is this:


I found a White ready-made card base (5 1/2 x 4 1/4") in my craft stash.  Then on my trimmer I cut a piece of Black card stock (5 1/4 x 4") and a piece of Gold card stock (5 x 3 3/4").  Then in my black scraps folder I found a black patterned piece edged in gold and I trimmed this to (5") in length.  

Next I got out my Big Shot and cut x3 Black stitched squares (1 1/2") and x3 White stitched squares (1").  

Then I stamped a Spring flower image on each White (1") square using Black pigment ink and then I immediately covered the card stock with clear embossing powder (obviously I had rubbed my Embossing buddy over the card stock prior to inking) and heat set this with my Heat Gun.  I repeated this x3.  (This is the first time I have used pigment ink when heat embossing and it worked really well.  I certainly will be using it in future as I have many different colours of pigment inks but don't tend to use it when stamping because it doesn't dry quick enough.)

The Black layer was adhered with double sided tape to the card base, as was the Gold layer to the Black card stock.  The patterned strip was adhered to the Gold layer with double sided tape too.  But the White squares were adhered to the Black squares using Tacky Glue.  When this was dry, the Black squares were positioned on the Gold card stock on foam pads to give the design some dimension.  I added a tiny rhinestone to the centre of each flower head as embellishment.


Inside the card, I stamped and head embossed the flower image the same as was done on the front of the card to extend the theme.  I had a ready-made sentiment in Black and Gold with White text "Have a Happy Birthday" in my craft stash.  I adhered this inside the card with snail adhesive.


On the envelope I stamped and heat embossed the flower image again and stamped in Black Memento Ink "Happy Mail" and the duck delivering an envelope so the recipient of this card will know that it is not a Bill!  This completed my project.

I would love to know what you think about my project, so please leave a comment.  Thank you.

Till next time, keep crafting!


Lorraine

:o) 

Saturday 7 April 2018

Super-Dad

Super-Dad

I found a 'Happy Father's Day' ready-made card in my craft stash with a square aperture (3 x 3"), so I looked in my files containing my cross-stitch patterns (Male theme file) and found a superhero image and on another pattern found the word 'Dad'; both of which would fit inside the aperture.

Next I cut some Aida slightly bigger than the square aperture on the card and got out my spare embroidery threads to use on this design.  Below is the finished cross-stitched card.


To continue the theme of 'Super Hero' inside the card I stamped the male superhero from Stampin' Up "Everyday Hero" stamp set.


I stamped a 'WOW' and a large spark in the bottom left-hand corner of the envelope, these were part of the Stampin' Up "Everyday Hero" stamp set too and it continued the theme onto the envelope.  


Also, I stamped my familiar 'Happy Mail' sentiment and duck delivering an envelope in the top left-hand corner of the envelope too.  This lets the recipient know that this is not a Bill!  This completed this project.


I would love to know what you think about my project, so please leave a comment.  Thank you.

Till next time, keep crafting!


Lorraine

:o) 

Lots of Pretty Kitties

Lots of Pretty Kitties

Stamping for Joy Sketch challenge Week 13 is shown below:


My take on this sketch is below here:


To create my card design initially I found a purple ready-made card (5 3/4 x 4") in my craft stash.  I trimmed a piece of patterned paper from Stampin' Up 'Wood Textures' (5 1 /2 x 3 3/4") and adhered this to the card base using foam pads.  I then cut 3 pieces of patterned paper from my purple scraps folder (3 1/2 x 1") and adhered these straight onto to the other patterned paper using snail adhesive making sure that they were evenly spread out.  

I then got out my Big Shot and die cut a cream card stock oval (4 x 2 3/4") and a green glitter card stock star was die cut too. (This was the smallest star shaped die I had in my stash)  This completed the die cutting.

Next came the stamping, I used Stampin' Up 'Pretty Kitty' stamp set and with all the different images I stamped these onto the oval (some of which were stamped off the edge). I stamped the sentiment "Hope your birthday is just like you..." in the centre of the oval.  Then I coloured the images in with my Prismocolor Pencils and after brightened up the kittens eyes with black and green gel pens. 


Inside the card I stamped the end of the sentiment from the front of the card which said "Hope your birthday is just like you..." and it said "WONDERFUL in every way."  I also stamped another of the images of Pretty Kitty to continue the theme of the card.


 On the envelope, I stamped one of the images of Pretty Kitty in the bottom right-hand corner.  This continued the theme of the card on the envelope too.


I also stamped my "Happy Mail" sentiment and the duck holding an envelope image too.  This lets the recipient know that this is not a Bill!  This completed my project.

I would love to know what you think about my project, so please leave a comment.  Thank you.

Till next time, keep crafting!


Lorraine

:o)  

Masculine Cards

Masculine Cards

In the kit for card making I got from Create & Craft along with quite a lot of Decoupage cards there was also card toppers and backing card stock to create Masculine cards.  On this blog page are two of the Masculine cards I created using the toppers and other card stock available.


For the card above I selected a scalloped ready-made white card base (6 x 6").  I then trimmed a blue spotted piece of card stock to (5 1/2 x 1 3/4') and also cut 2 x (1 1/4") circles out on the Big Shot using the same card stock.  The other card stock used measured (5 1/2 x 3 1/3"), on this piece I rounded the corners on the top and bottom on the right-hand side.  The two pieces of card stock were adhered butt up together directly onto the card base.  The two circles were adhered straight on top at the right-hand corner directly under each other.  Then the card topper was put on top using foam pads slightly off centre.  Inside I stamped a row of stars continuing the stars from the sentiment on the card topper.  This completed this project.


This card was put onto a White ready-made card base (5 1/2 x 5 1/2").  I then trimmed a piece of blue plaid card stock to (5 1/4 x 5 1/4") and adhered this straight to the card base.  The card topper was then added using foam pads.  I stamped a row of stars inside the card to continue the theme from the front of the card.  This completed this project.

The row of stars were also stamped on both envelopes as was 'Happy Mail' sentiment and the duck and the envelope image which tells the recipients that their mail is not a Bill!  


I would love to know what you think about my projecta, so please leave a comment.  Thank you.

Till next time, keep crafting!


Lorraine

:o)  

Decoupage Cards (set 3)

Decoupage Cards (set 3)

So following on from the last set of Decoupage Cards I had designs which were more feminine on each of these I added extra ribbon and bows were appropriate.  Inside two I had printed birthday verses which I adhered inside using double sided tape.  On the other two I printed the sentiments one stamp was "a little note to say Thank You" and the other stamp was "Happy Birthday".  


This last decoupage card is slight different as it is a 'telescope technique' because the pieces are going from large to small images.  

Finally on all the envelopes I stamped a set of 4 flowers to continue the theme of the material of the dresses and also the duck delivering an envelope and the sentiment 'Happy Mail' so my recipients would know that their mail was not a bill!  This completed all my projects.

I would love to know what you think about my projecta, so please leave a comment.  Thank you.

Till next time, keep crafting!


Lorraine

:o)  

Week 3

Incredible Like You (2) Second set of 4 cards created from the card kit from Stampin' Up 'Incredible Like Y...